Table of Contents
Become a Reseller #
As a reseller partner, you can offer our products and services to your own client base while enjoying competitive margins.
Key Benefits: #
- Flexible Earnings: Set your own pricing to maximize profits.
- Comprehensive Support: Access resources and support to help you succeed.
How to Get Started: #
- Before sending a reseller request, you need to create a reseller account.
- To create a reseller account, click on the signup page on the Agency Simplifier website. (Sign Up Process for Agency Simplifier)
- An email texted, “Create Your AgencySimplifier Account To Unlock Reseller Benefits,” is received at the client’s email account.

- Log in to your client’s account on the Agency Simplifier using valid credentials. This will take you to the Dashboard page.
- Click on the “Become a Reseller” option in the client dashboard of Agency Simplifier. This will display the Reseller Partners page.

- From there, select a store and click on the “Reseller Request” button.

- This request will be sent to the “Reseller Request” section of the Admin account.
- The client or reseller email account will receive an email with the title “Confirmation of Reseller Request Submission”.

- The admin email account will receive an email with the subject “New Reseller Request Submitted—Verification Needed.”

- After the admin approves the request, an email texted “Confirmation of Reseller Request Approved” is received at the reseller email account.

- Log in to the reseller account of the Agency Simplifier with valid credentials.
- It navigates to the reseller’s dashboard.
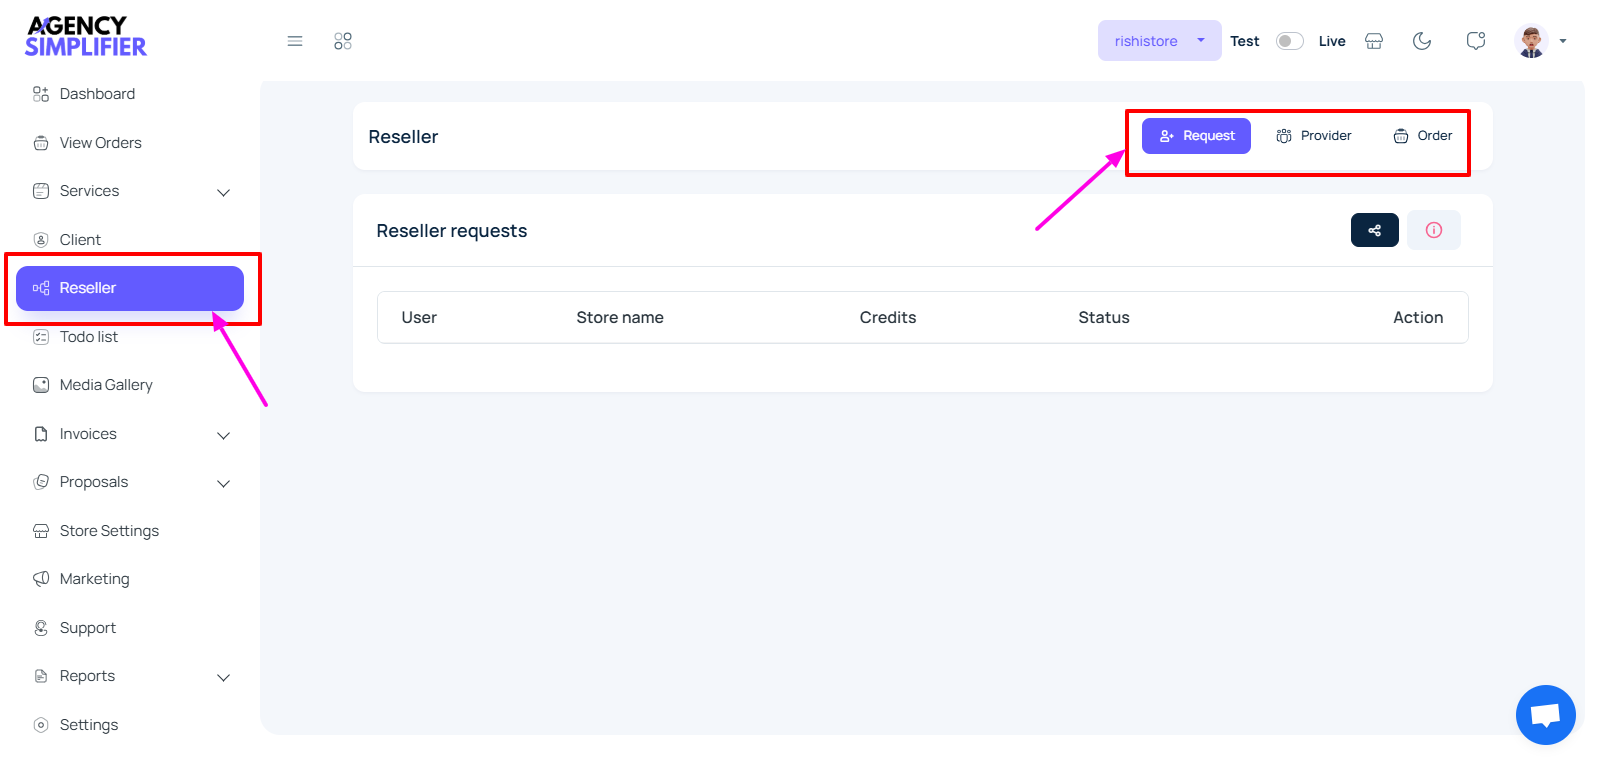
- Click on the “Reseller section” in the left sidebar.

- This displays three options:
- Reseller Request: This feature enables streamlined management of reseller requests and simplifies the approval or rejection process for administrators.
- Reseller Provider: It serves as a platform to streamline the interaction between the admin and the reseller for service imports and partnership control.
- Reseller Orders: The “Reseller Orders” section provides a centralized interface for managing all orders placed by resellers.
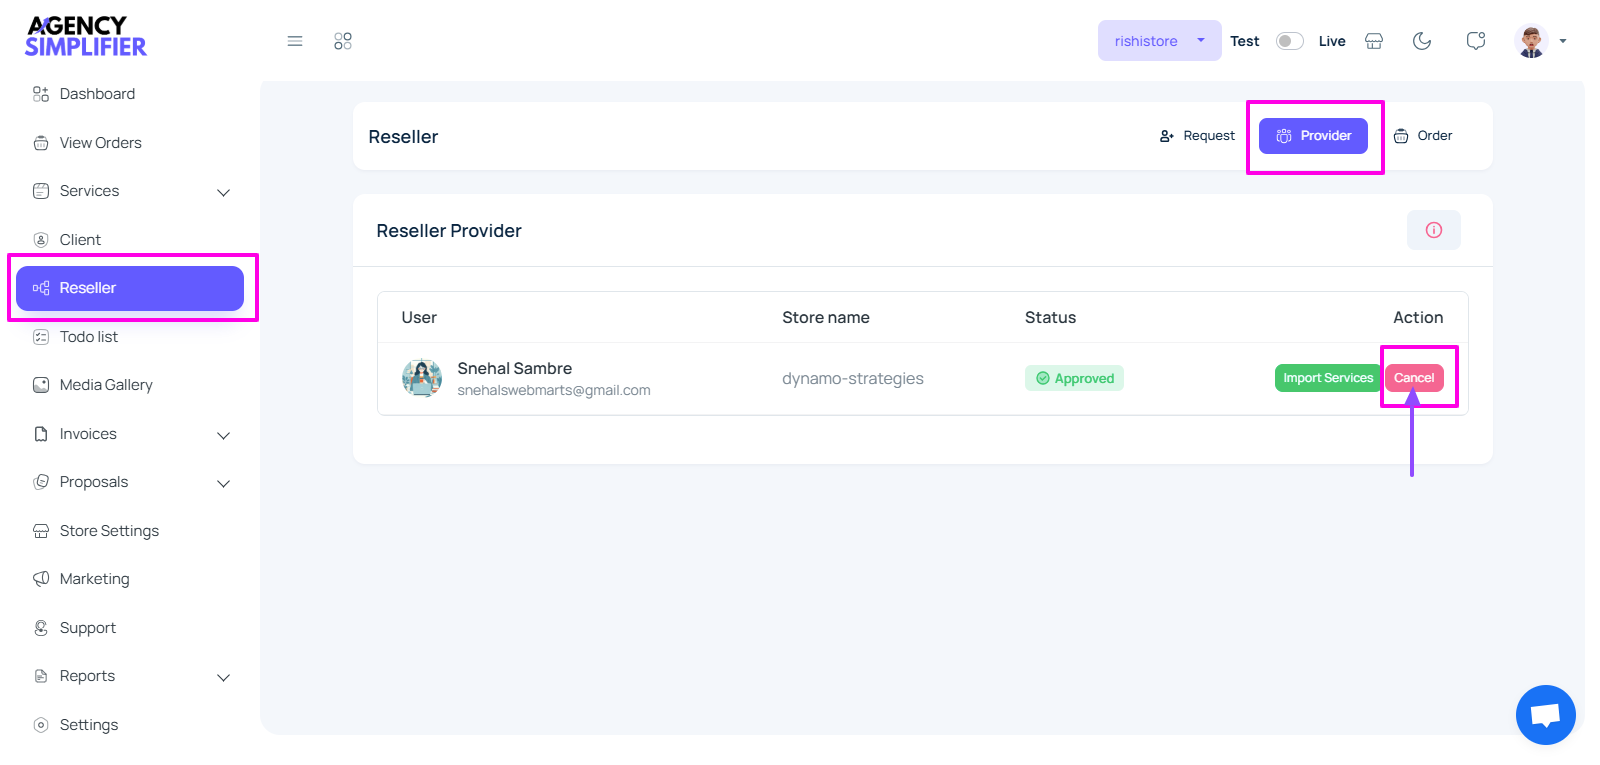
Reseller Provider #
Description:
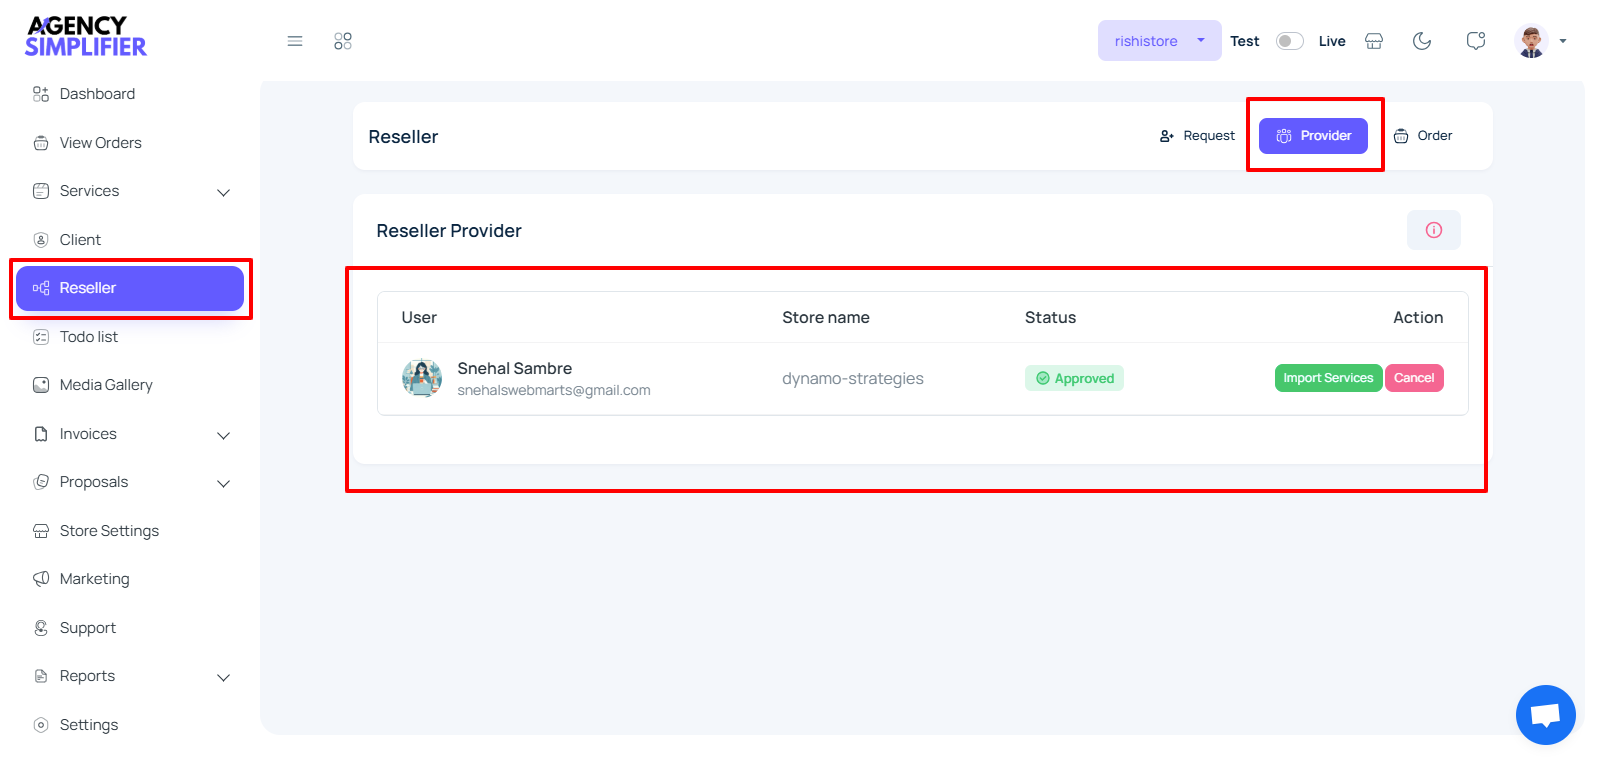
- The “Reseller Provider” section in the reseller module allows you to manage and interact with providers approved for your reseller account.
- This section provides details about the provider, including their store name, email address, and approval status.
- You can also perform actions such as importing services or canceling the provider.
- Resellers can only import provider services in the same currency as their credit.
-
Steps to Use the Reseller Provider Section: #
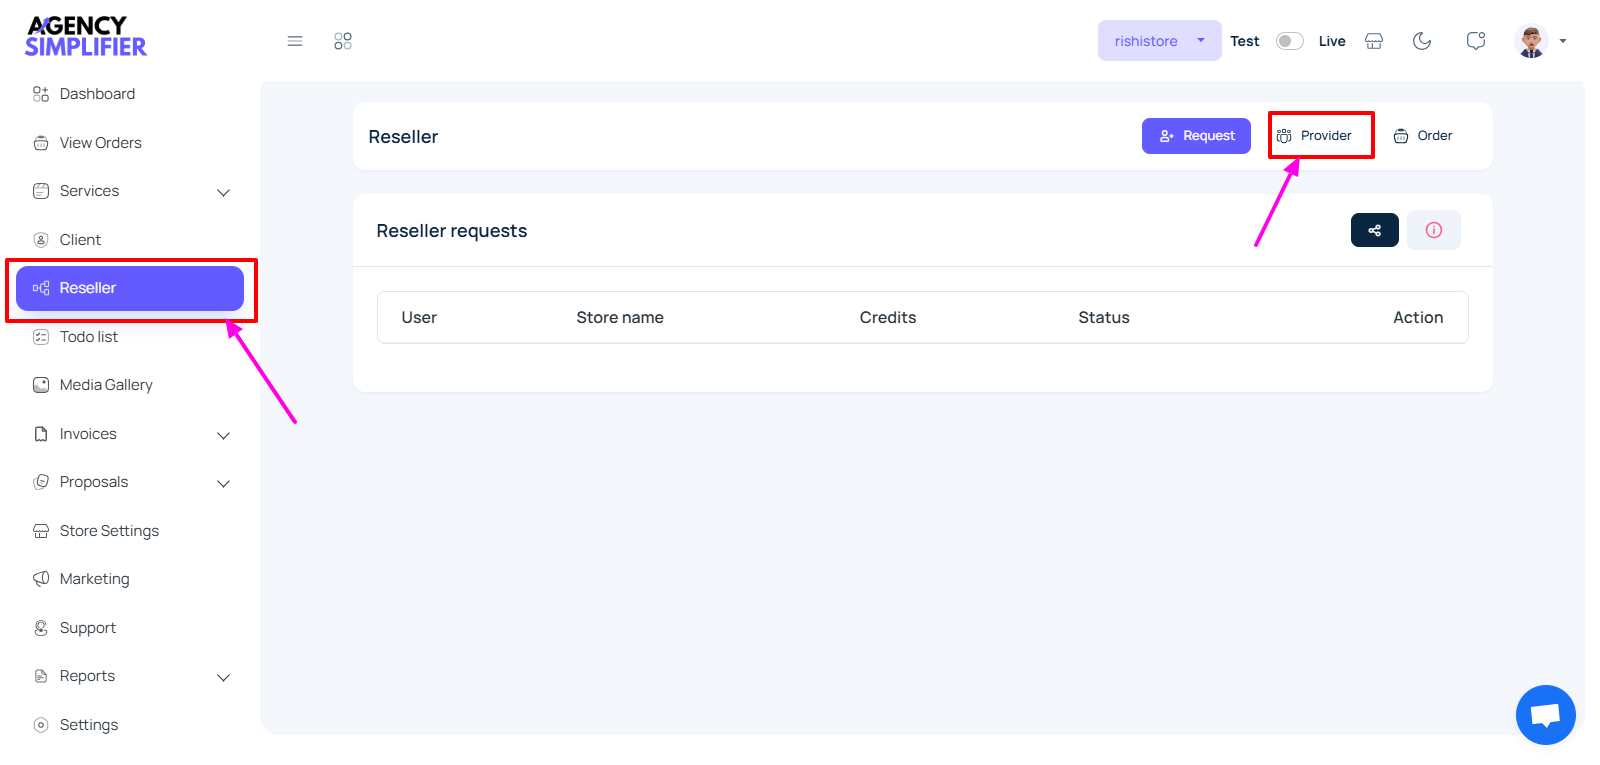
- To navigate to the “Reseller Provider” section, go to the “Reseller ” module in the left-hand menu.
- Click on “Reseller Provider” under the Reseller section.
-
- See the list of approved reseller providers, including:
- User
- Email Address
- Store Name
- Status
- Action
- See the list of approved reseller providers, including:
-
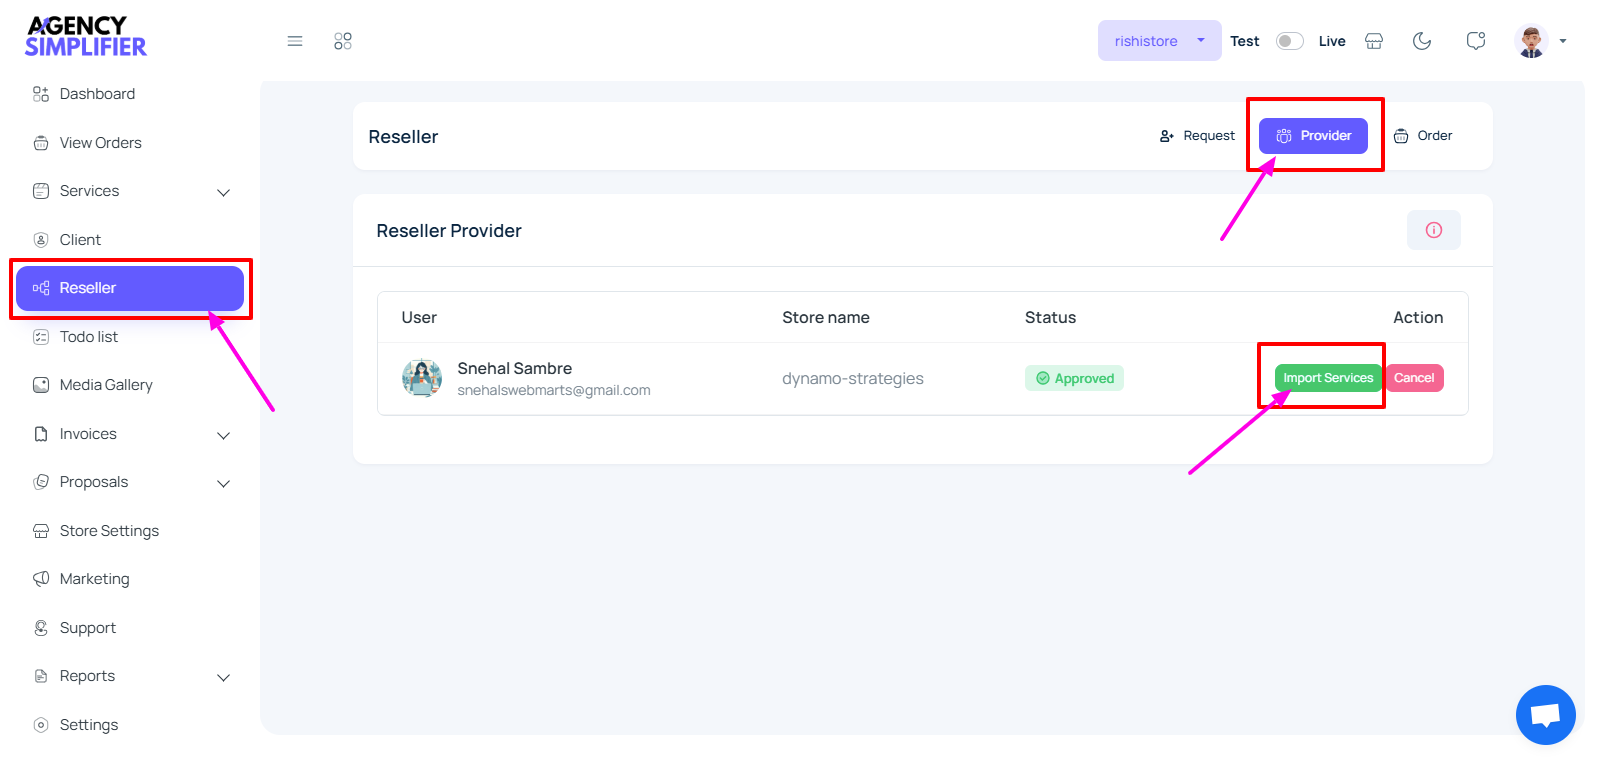
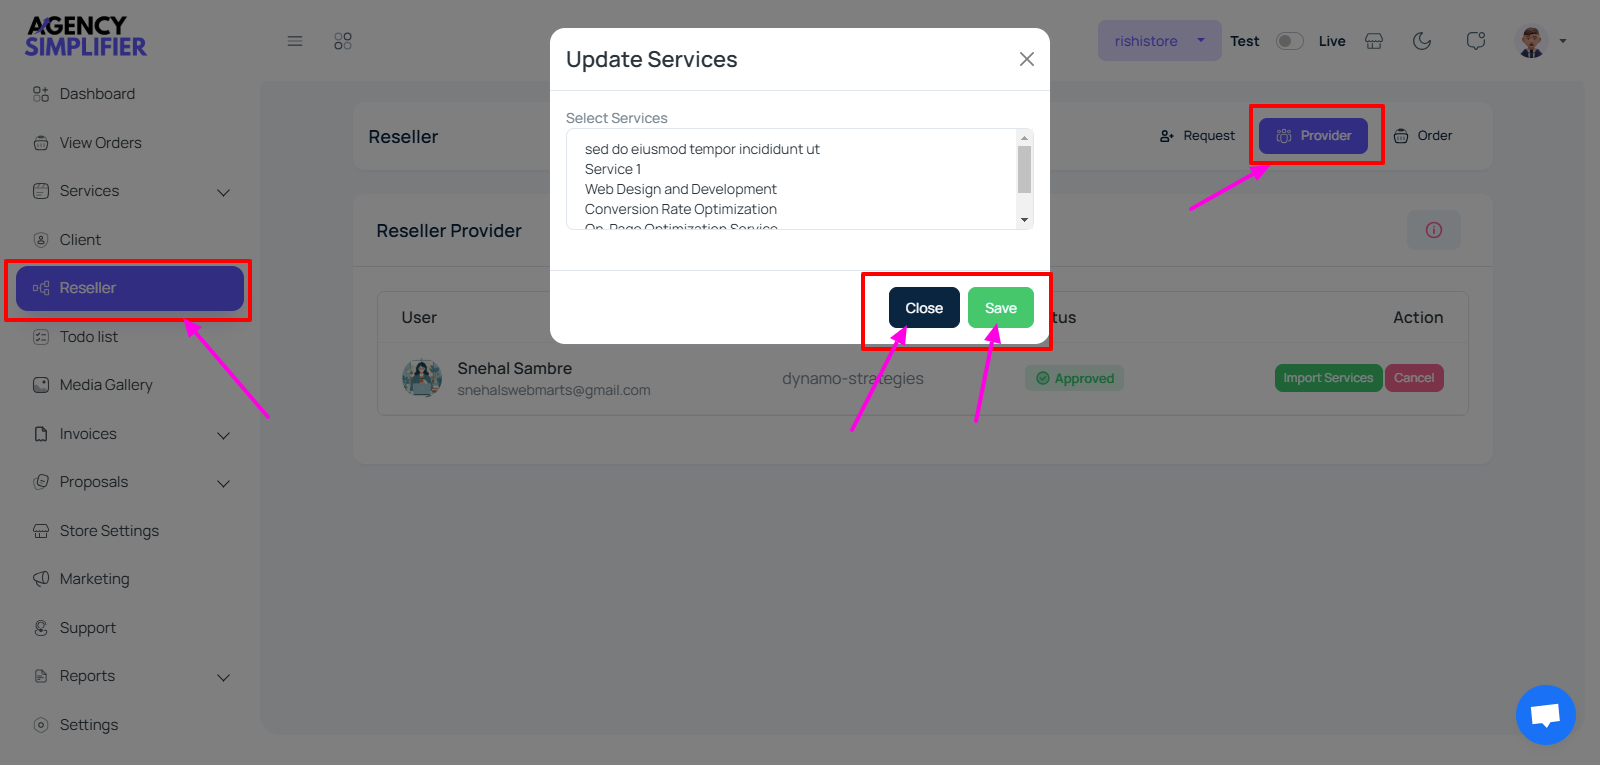
- Click on the “Import Services” button in the action column to import the services of the reseller provider.
-
- A modal dialog box labeled “Update Services” will open.
- Select the service and click the “Save” button; otherwise, click the “Close” button.
-
- A success message will display; click on the “OK” button.

-
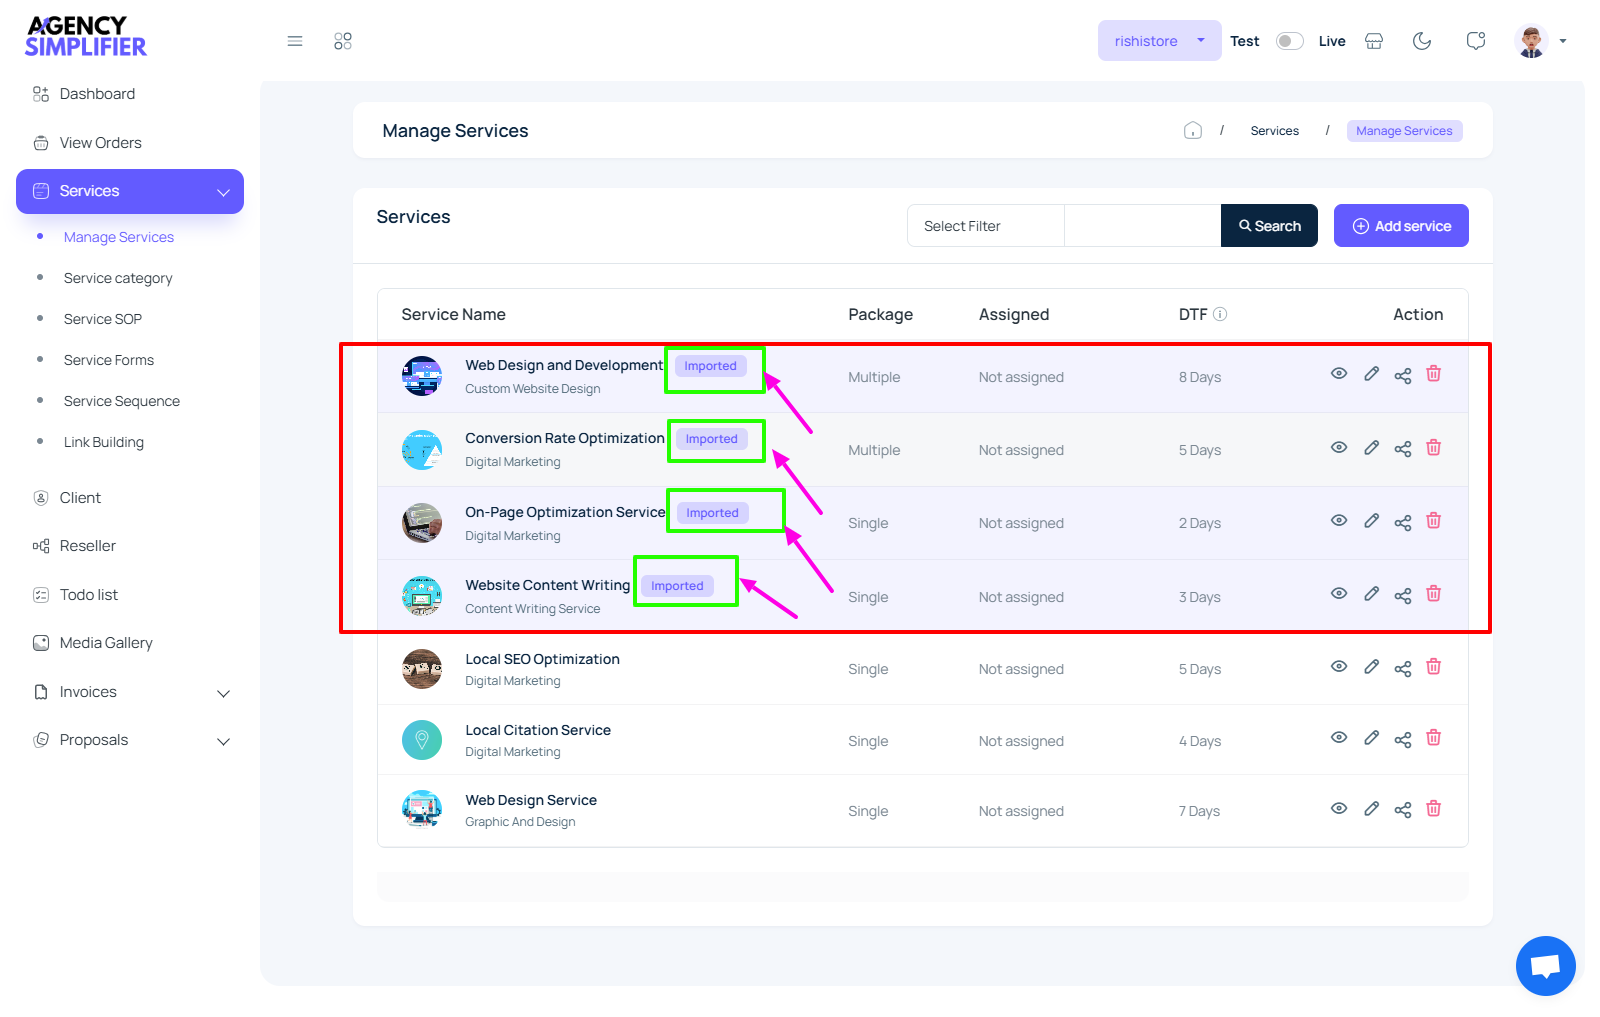
- The imported services will be displayed in the “Manage Services” section of the Services menu.
- In the Manage Services section, resellers can edit services.
-
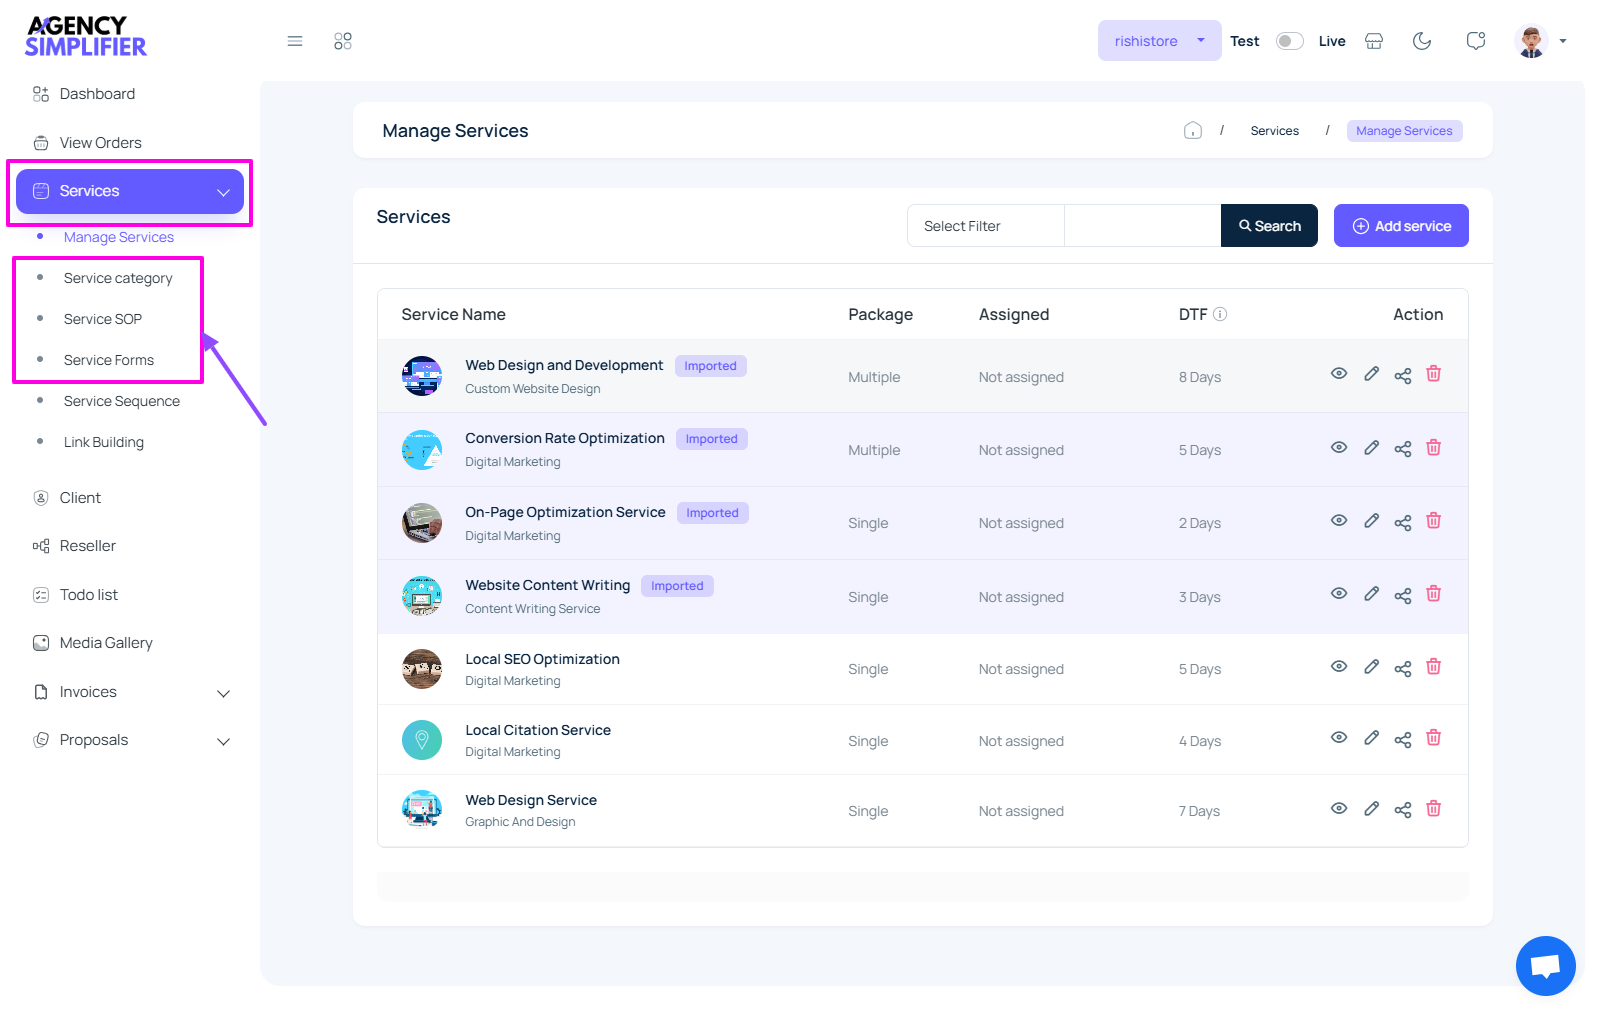
- You will also see service categories, service SOPs, and service forms in their respective sections.
-
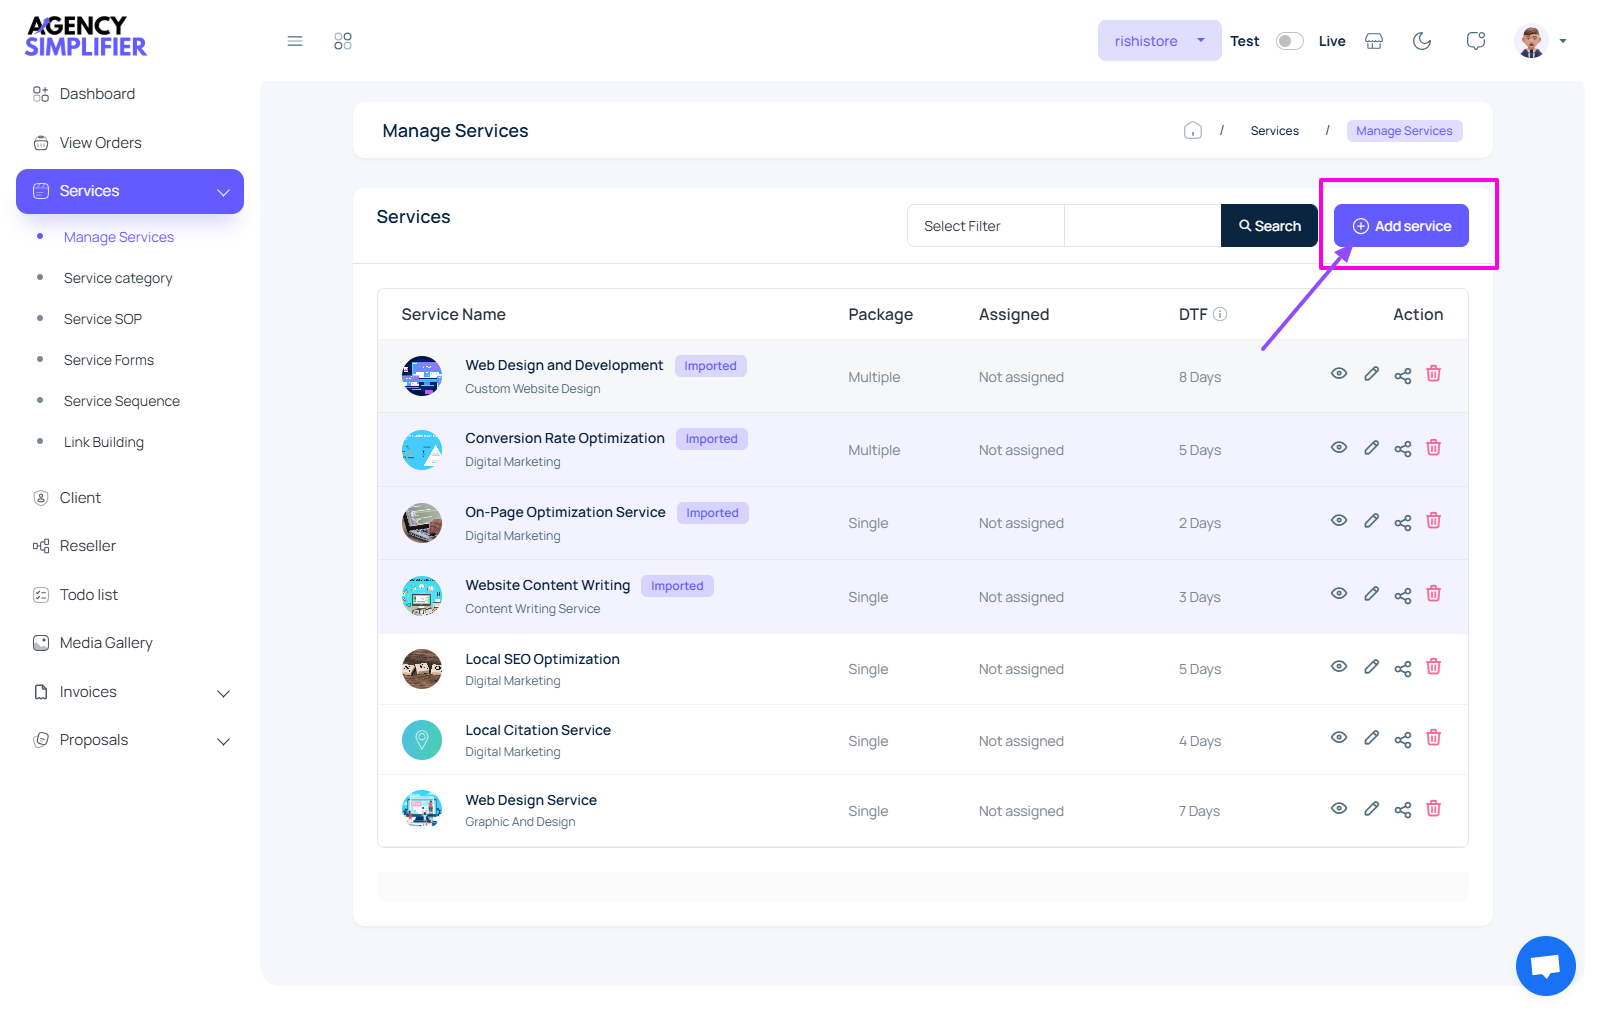
- By selecting the “Add service” button, a reseller can add his own services.
-
- In the Service Sequence section, resellers can manage the service sequence.

- Cancel Provider:
- Click the “Cancel” button to remove the reseller provider from your account.
Reseller Orders #
Description:
- The Reseller Orders section provides a centralized interface for managing all orders placed by resellers.
- When a client of the reseller purchases an order for service imported from the provider, they are displayed in the reseller orders section.
- Here, a reseller can easily view detailed information about each order.
-
Steps for Managing Reseller Orders #
- To navigate to the “Reseller Orders” section, go to the “Reseller ” module in the left-hand menu.
- Click on “Reseller Orders” under the Reseller section to view all active orders.
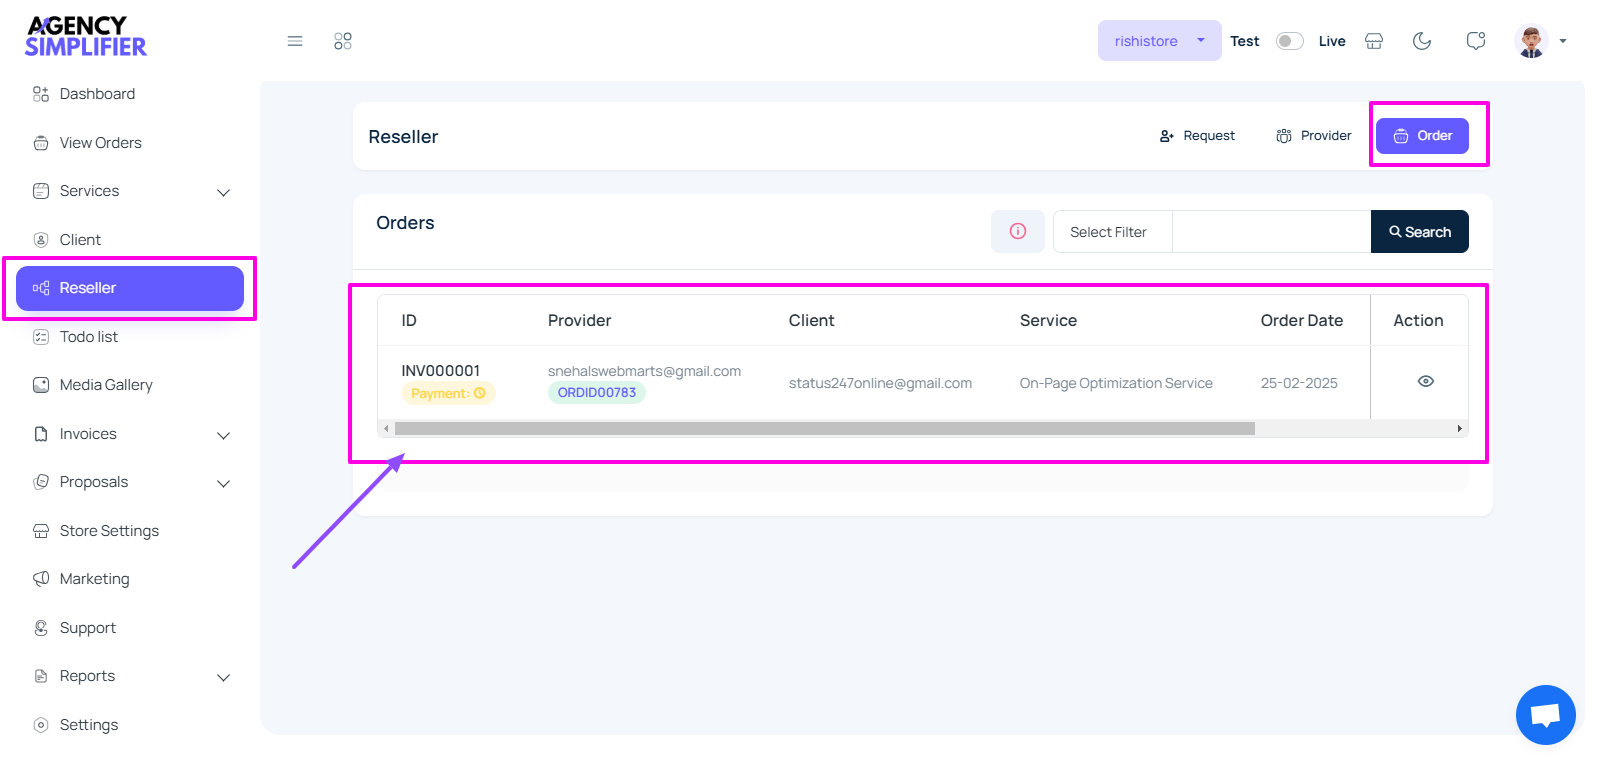
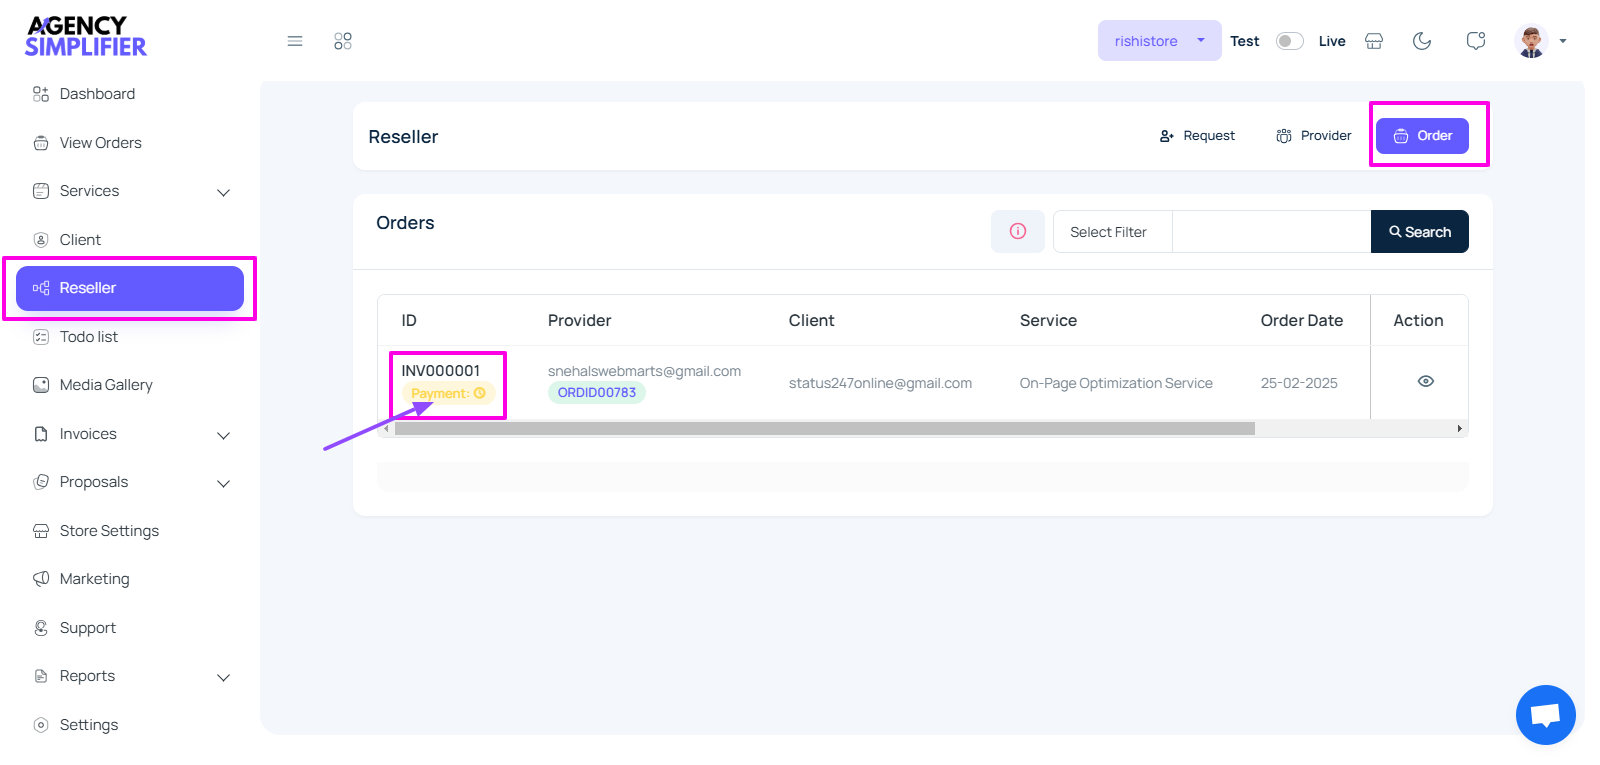
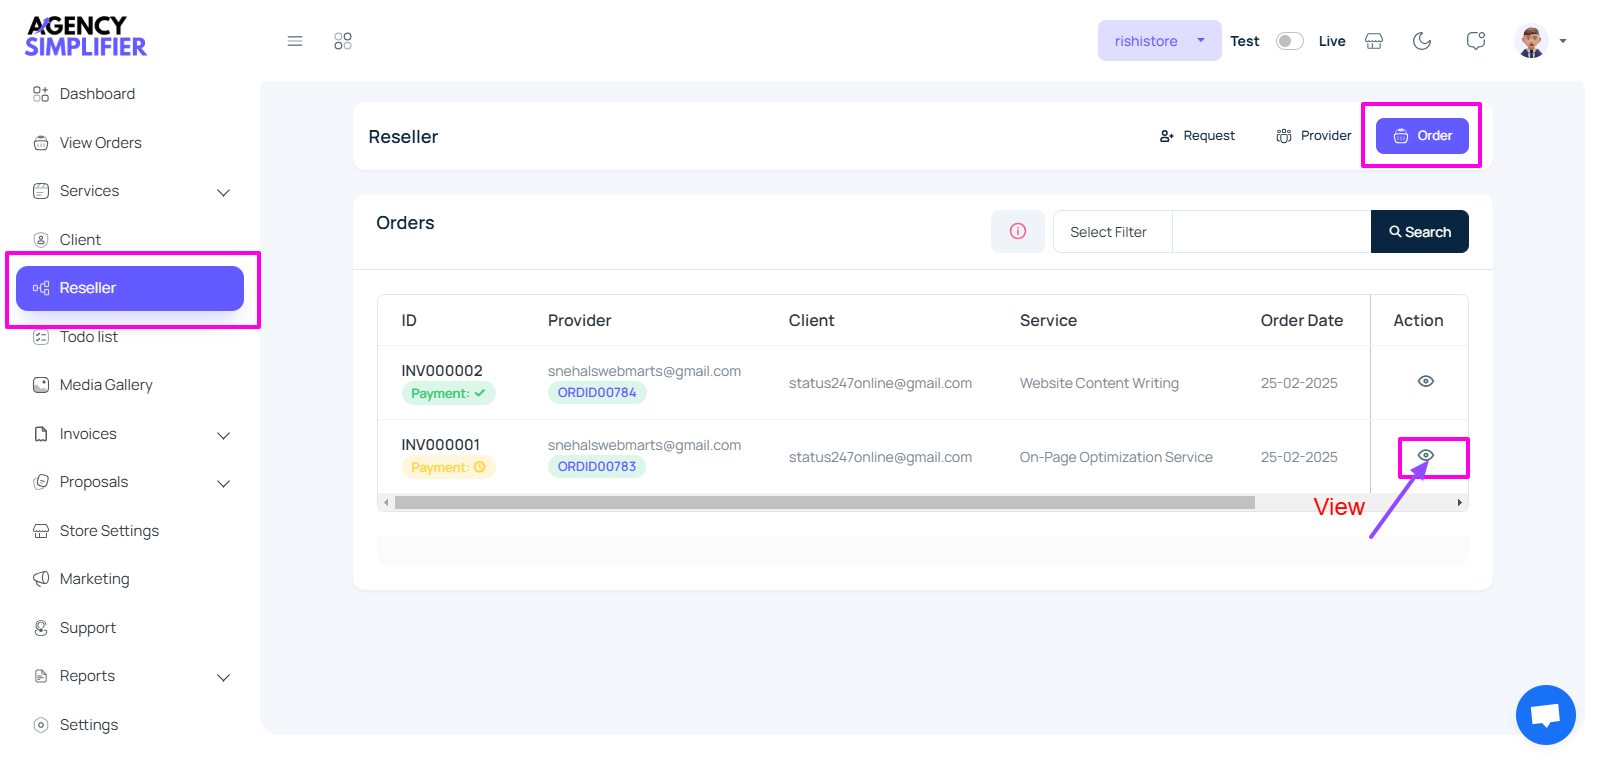
- In the Reseller Orders section, you’ll see a list of orders, including order ID, provider, client, service type, order date, deadline, and payment status.
- Click on the eye icon in the “Action” column next to an order to view detailed information about that specific order.

- Check the payment status (indicated with a payment icon) to ensure all necessary payments are completed.

- If the reseller doesn’t have enough credit, the payment status will display as pending.
- The reseller’s email account will receive an email with the subject ‘Order Not Processed Due to Insufficient Credits’.

- After adding sufficient credits, the reseller can change the status from pending to success using the ‘Payment Status’ option.
- To change payment status, click on the eye icon “View order” in the “Action” column of the reseller orders page.
- An order info page will open.
- Click on the “Payment Status” option of the “Manage orders” section.
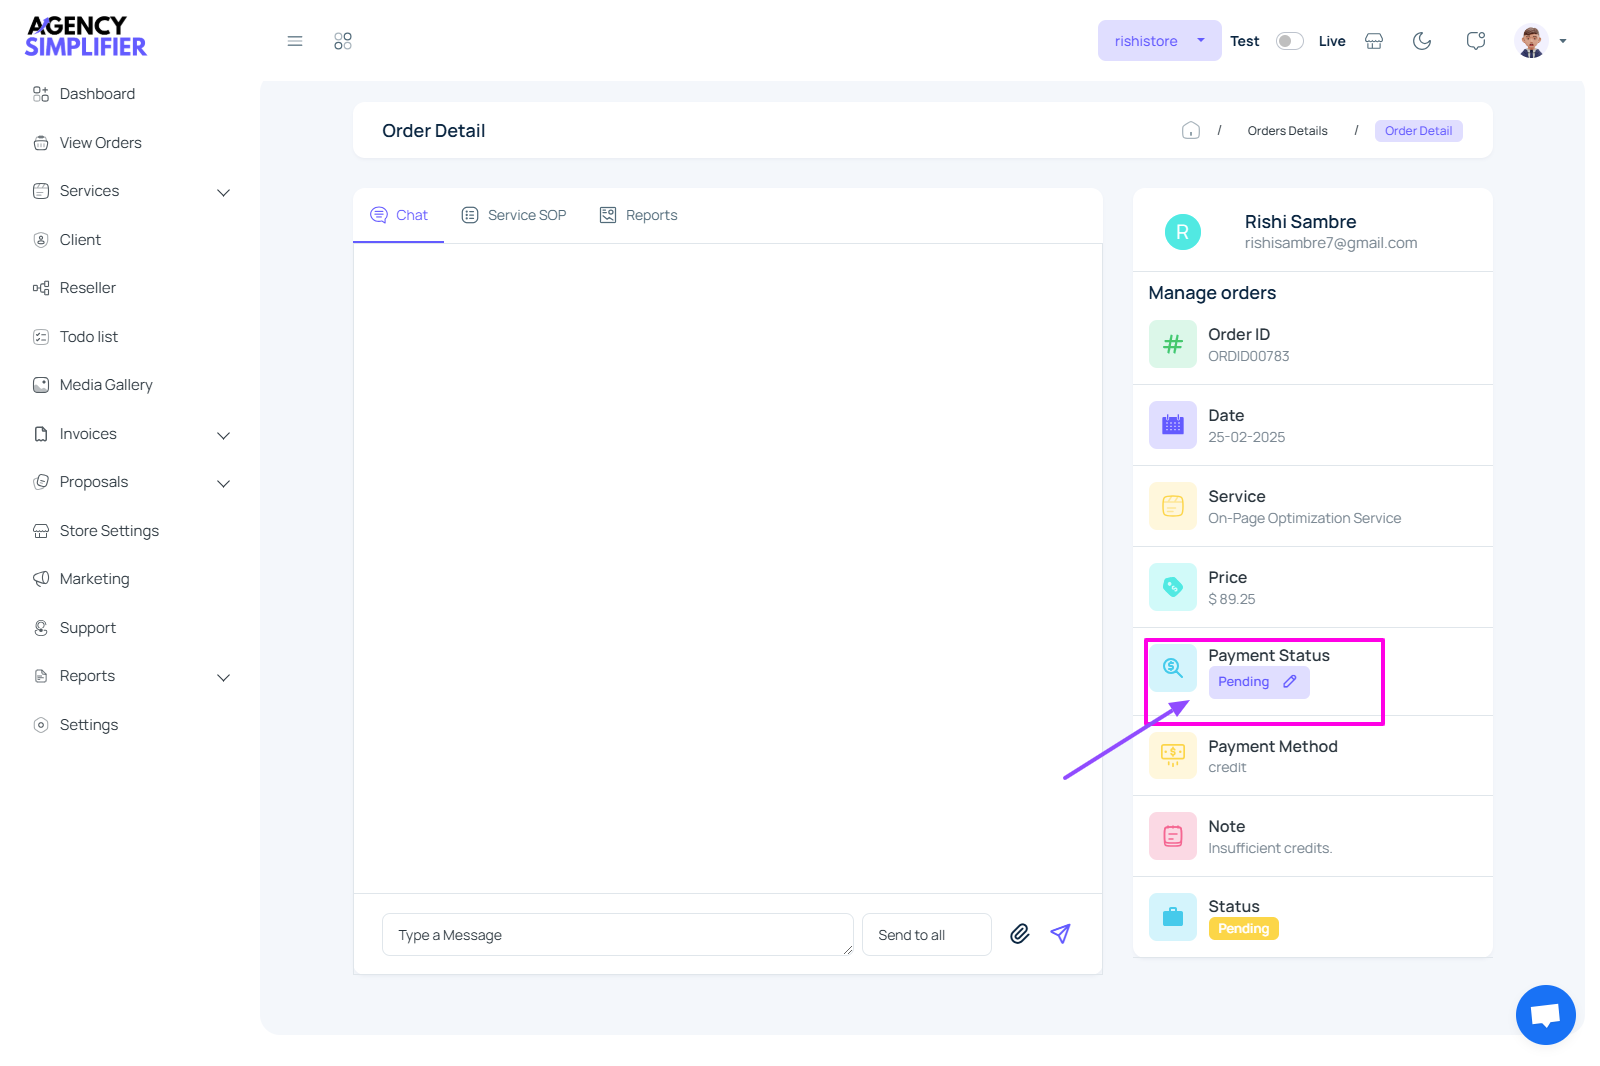
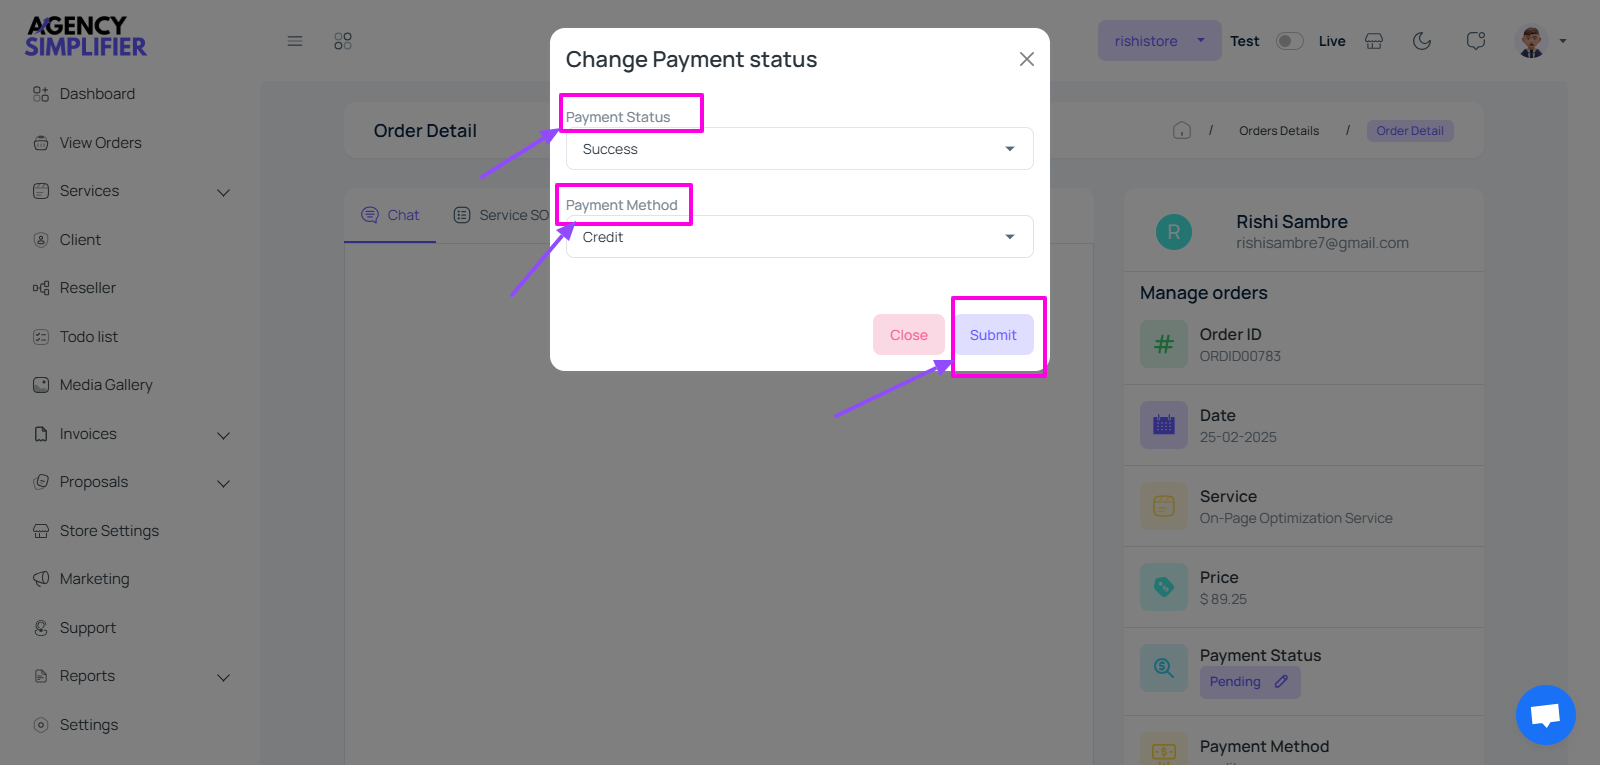
- A modal dialog box “Change Payment status” will display.
- Select payment status from the “Payment Status” dropdown list.
- Click on the “Submit” button.
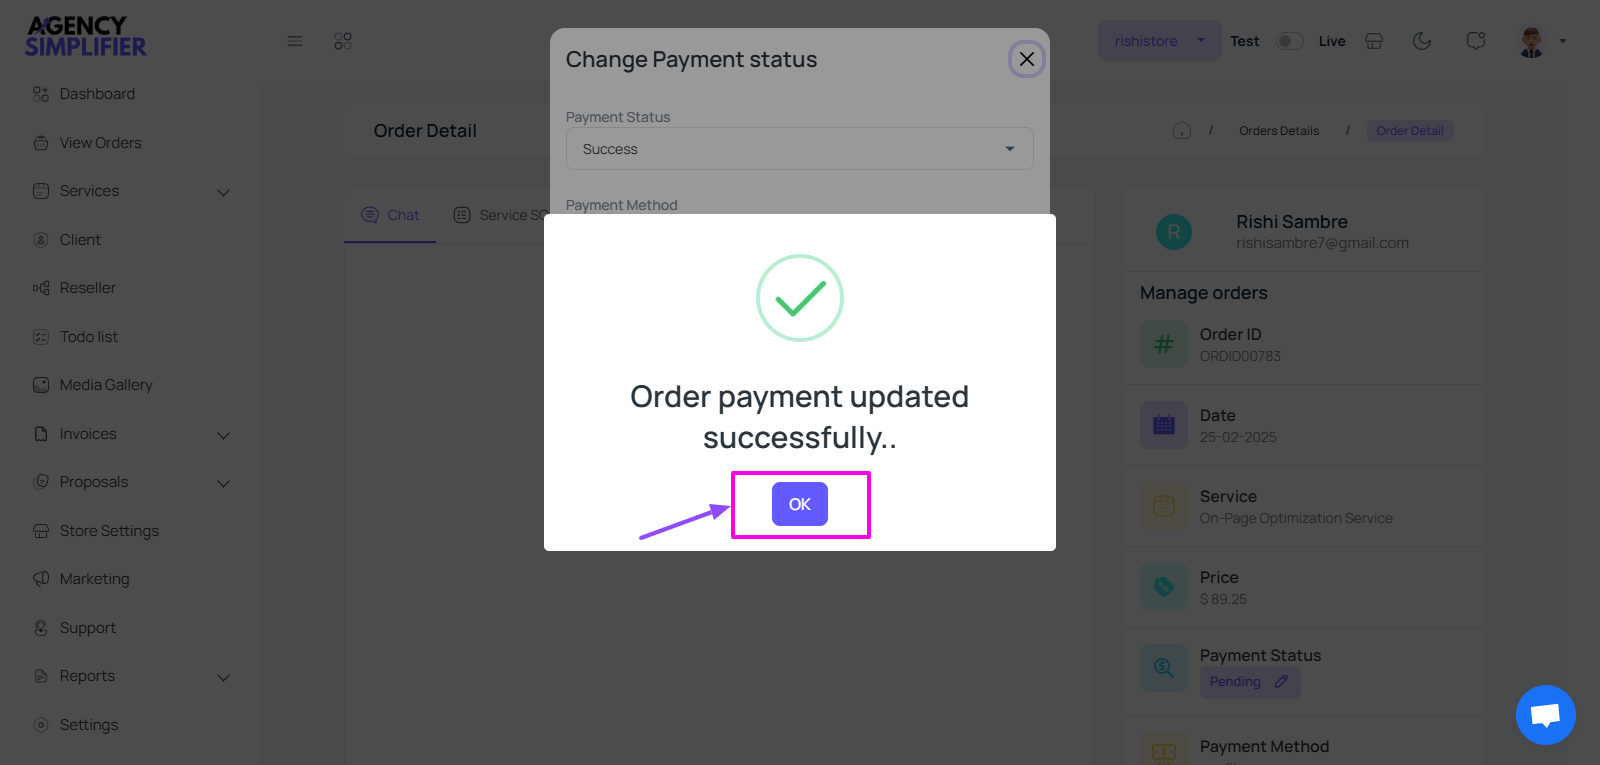
- A success message will display.
- Click on the “OK” button.
- This feature helps admins manage and monitor reseller transactions effectively, ensuring smooth operations and accountability within the reseller network.


