Table of Contents
Click here to watch the Add Service video. #
Manage Services #
The Manage Service feature lets you create, edit, and delete services.
This page shows a list of services. For each service, the table shows:
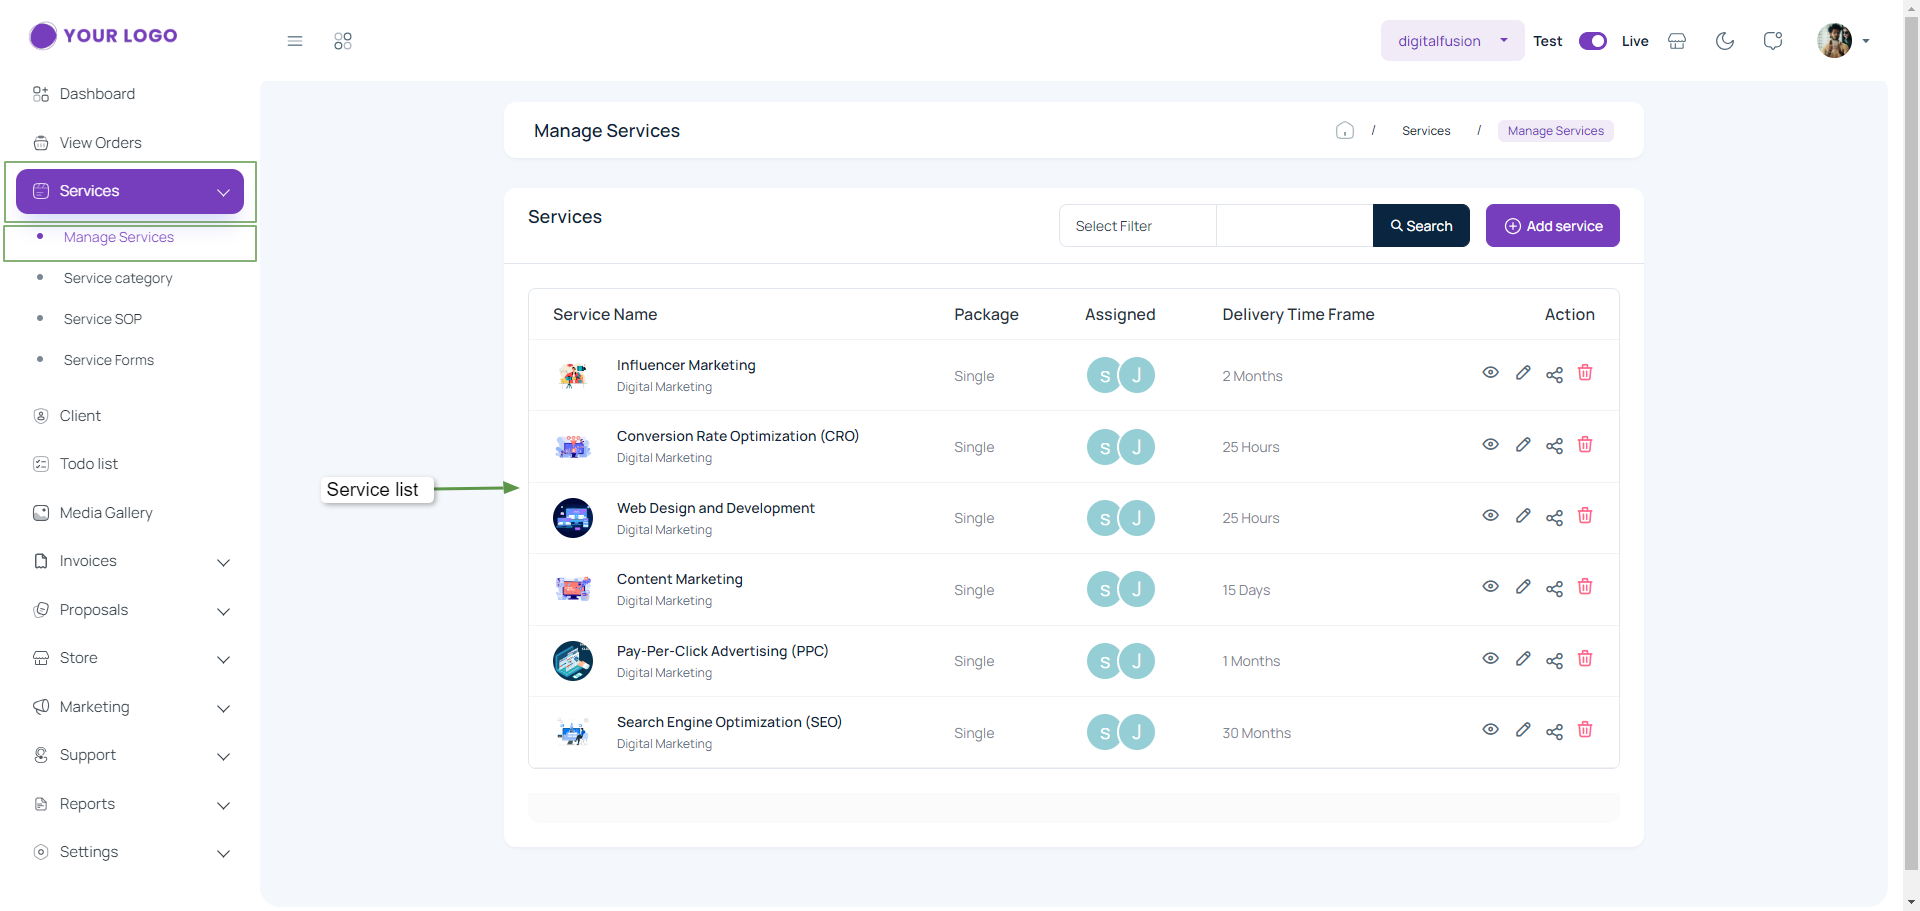
- Service Name: the name of the service, along with a brief description of the type of service.
- Package: whether the service is offered as a single package or in multiple packages.
- Assigned: the person(s) assigned to the service.
- Delivery Time Frame: the estimated time required to complete the service.
- Action: icons for viewing, editing, sharing, or deleting the service.
Add Service #
Agency Simplifier’s “Add service” feature lets users add new services to their profile.
Precondition to use the feature:
- Users need an active account on Agency Simplifier.
- Users must be logged in to use this feature.
- Only Super Admins or Admins have the ability to create a service using this feature.
This feature helps users showcase their services, increasing visibility and attracting potential clients.
# Steps to Use : #
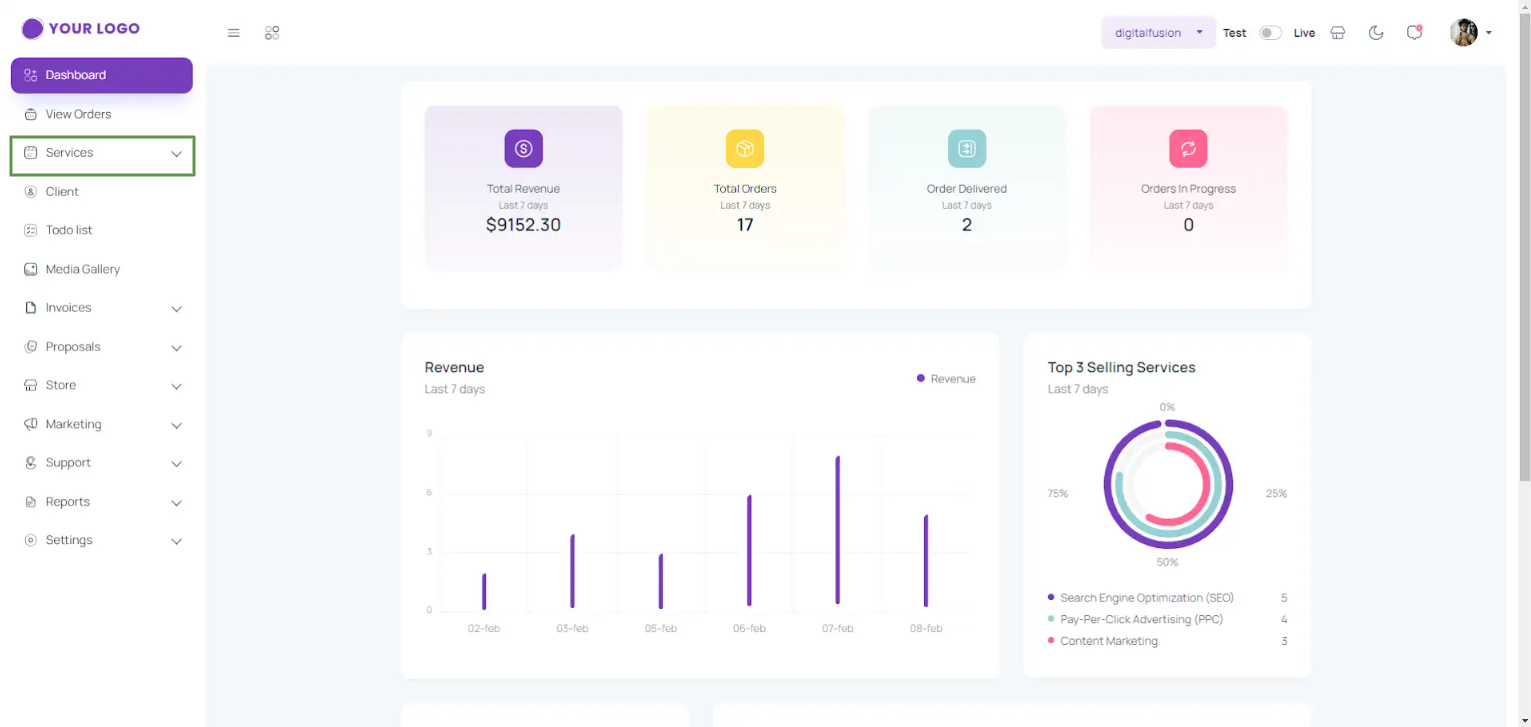
- Click on the “Services” section.
- In the “Services” section, click on “Manage Services.”
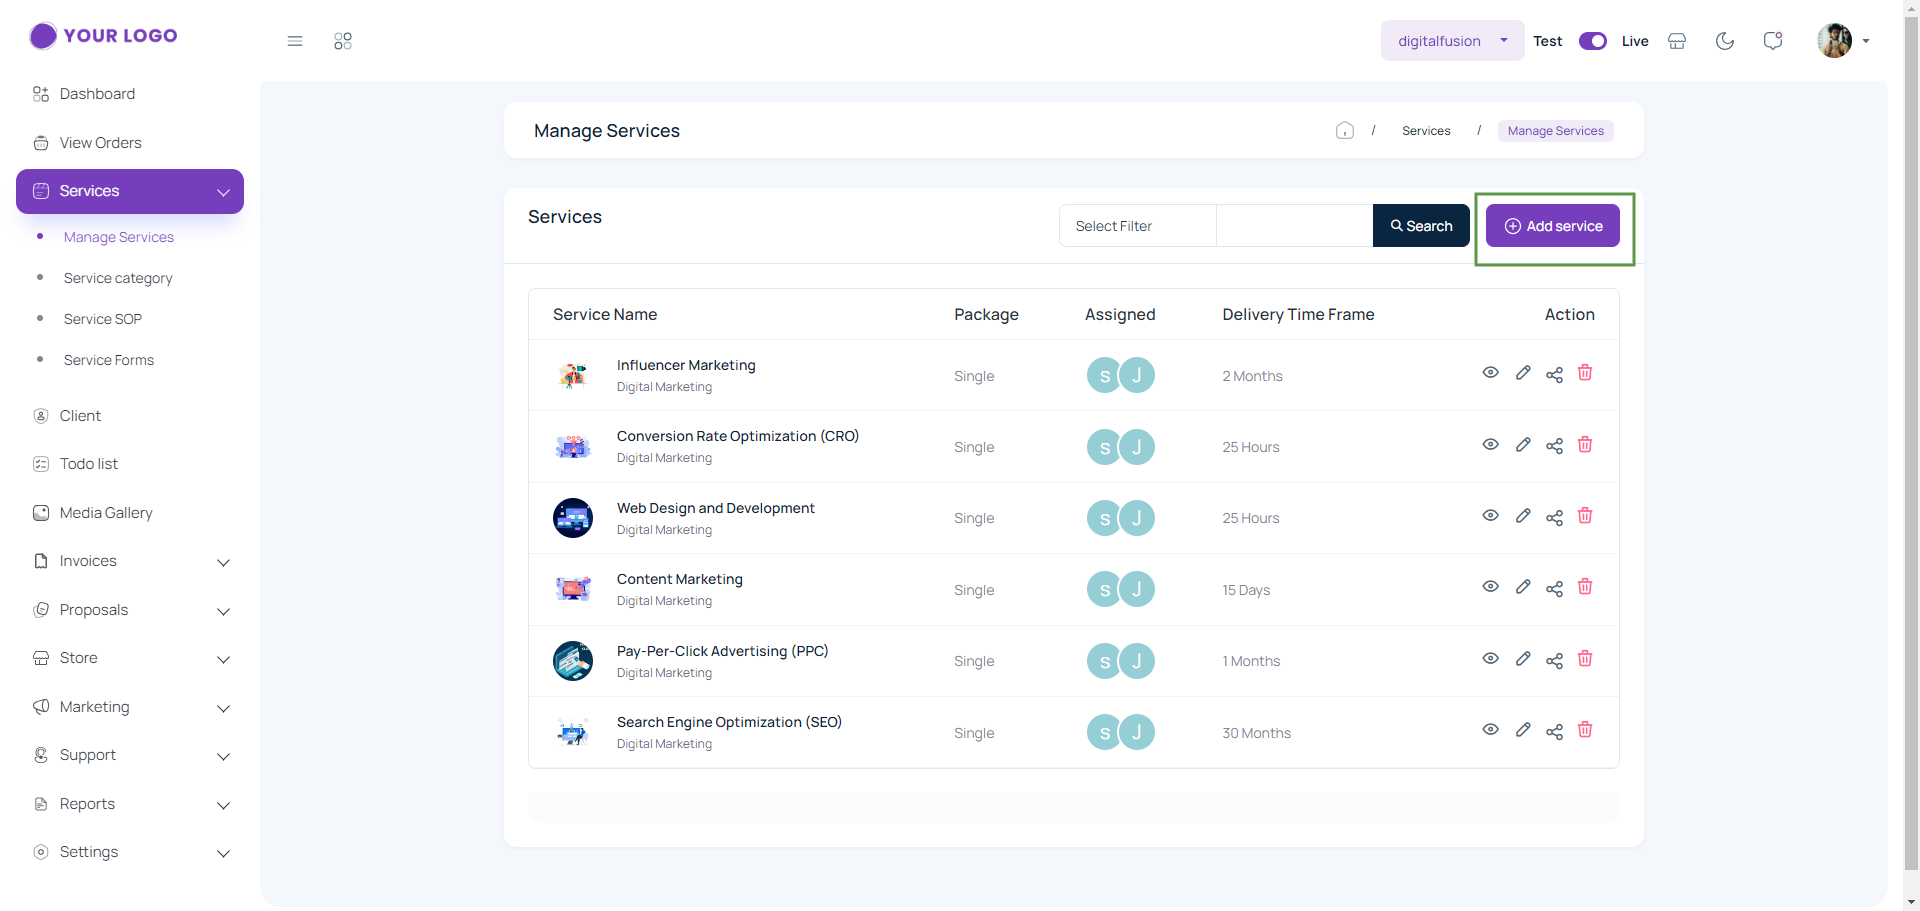
- On the “Manage services” page, click on the “Add Service” button located on the left side. A form will appear.
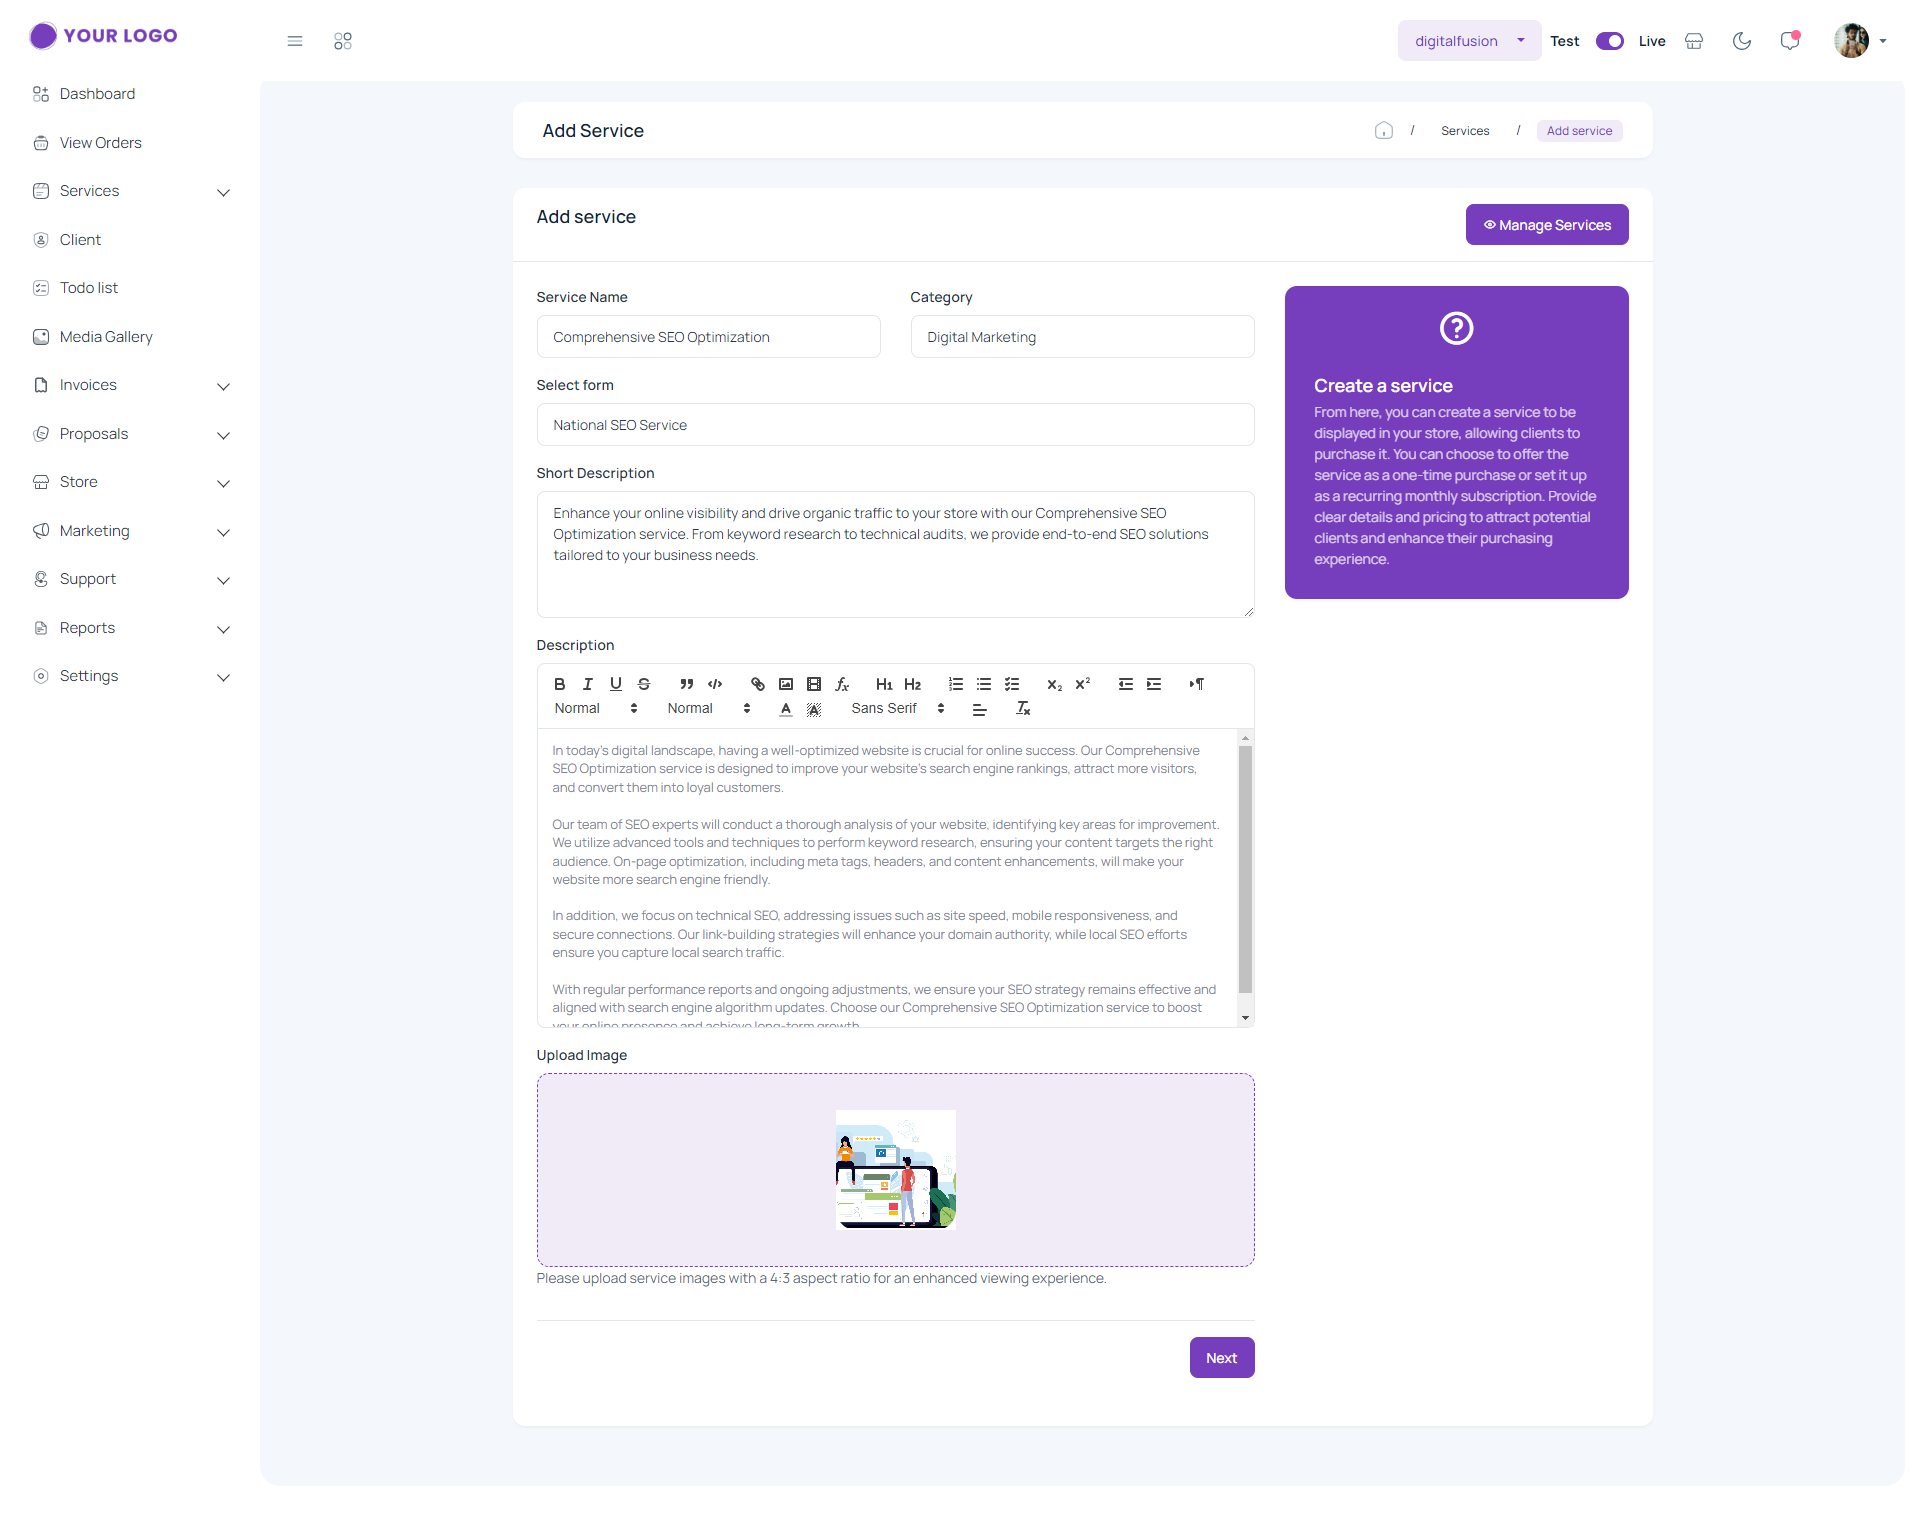
- Service Name : Choose a clear and descriptive name that helps clients easily understand what your service is about.
- Category : Select the category to which the service belongs.
- Select form : Select the form that service will use.
- Short Description : Add a brief description about a service.
- Description : This section provides a rich text editor to add a detailed description of the service. You can format the text using bold, italics, headings, and other formatting options.
- Upload a service image : Upload a service image related to the service with a 4:3 aspect ratio, which will be displayed in the store.
- Next : Clicking on the “Next” button redirects you to the next page of the form.
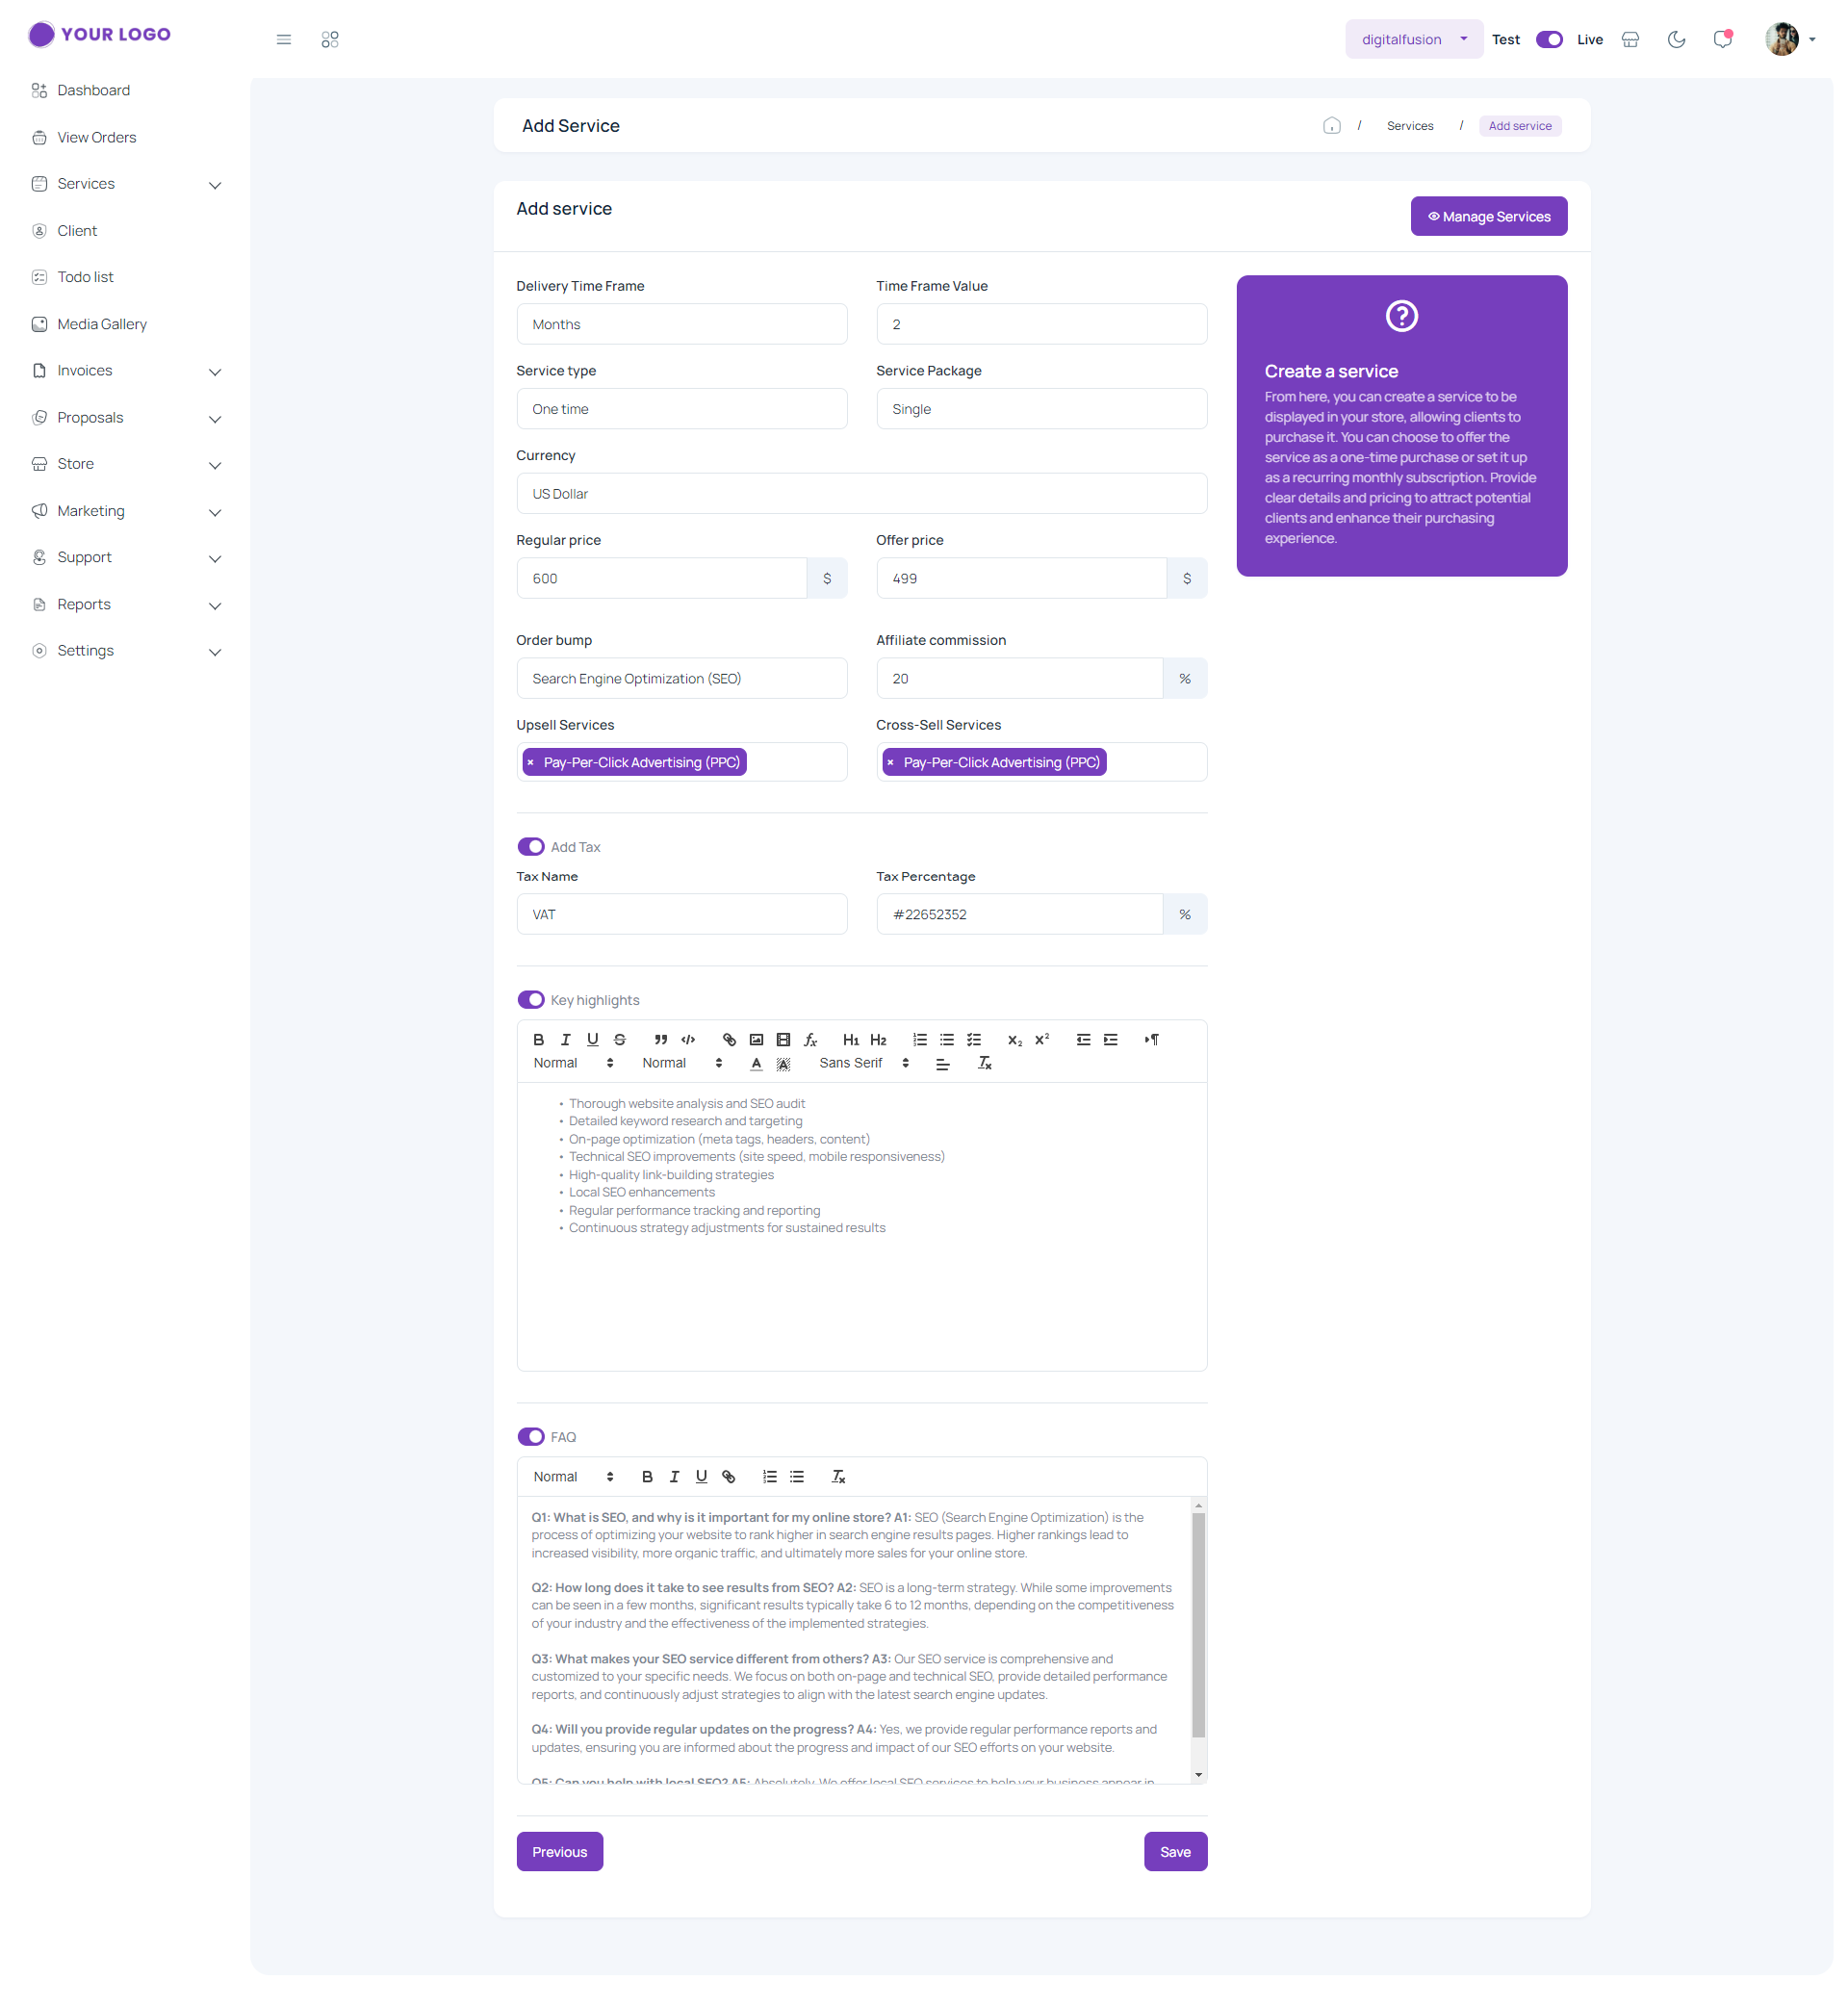
- Delivery Time Frame : This field allows you to specify the timeframe for the delivery of the service. You can choose from a pre-defined list of options, such as hourly, daily, or monthly.
- Time Frame Value : This field allows you to specify the timeframe for the service.
- Service type : This field allows you to select the type of service you are offering. You can choose between one-time services and recurring services.
- Service Package : This field allows you to select a pre-defined package for the service, such as Single or Multiple. If in the service package, select a single option, then include the regular price and the offer price.
- Regular price: This field allows you to enter the regular price of the service.
- Offer price: This field allows you to enter a discounted price for the service.Currency: This field lets you choose the currency in which the service’s price will appear.
If in the service package, select multiple options, then include multiple packages with corresponding package prices. - Package Name : This field allows you to enter the package name of the service.
- Package Price: This field allows you to enter a price corresponding to the package name for the service.
- Currency: This field lets you choose the currency in which the service’s price will appear.
- Local Citation Audit : The Local Citation Audit checkbox allows you to specify whether this service includes a local citation audit. This means that the service will analyze and assess the accuracy and consistency of the business’s information across various online directories and platforms. If you check this box, it indicates that the service includes a local citation audit as part of its offering.
- Order bump: Select additional services to add to the order using this field.
- Affiliate commission : This field allows you to set a commission percentage for affiliates who refer clients to your service.
- Up- sell Service : “Upsell Services” is a section to define services offered as additional options to customers who are already purchasing another service.
- Cross-Sell Services : This field allows you to select other services that you can offer to clients who are purchasing the current service.
- Add Tax : This field allows you to enable or disable tax on the service.
- Tax Name : In this field, add the tax name.
- Tax Percentage : In this field, add the tax percentage.
- Key highlights : This field allows you to add key highlights or key selling points for the service.
- FAQ : This field allows you to add frequently asked questions about the service.
- Save : Click the “Save” button to create your service. You have created your first service. It will be stored in the Service section and Store page ; you can access it anytime.
To view the video on View, Edit, and Delete Service, click here. #
View Service #
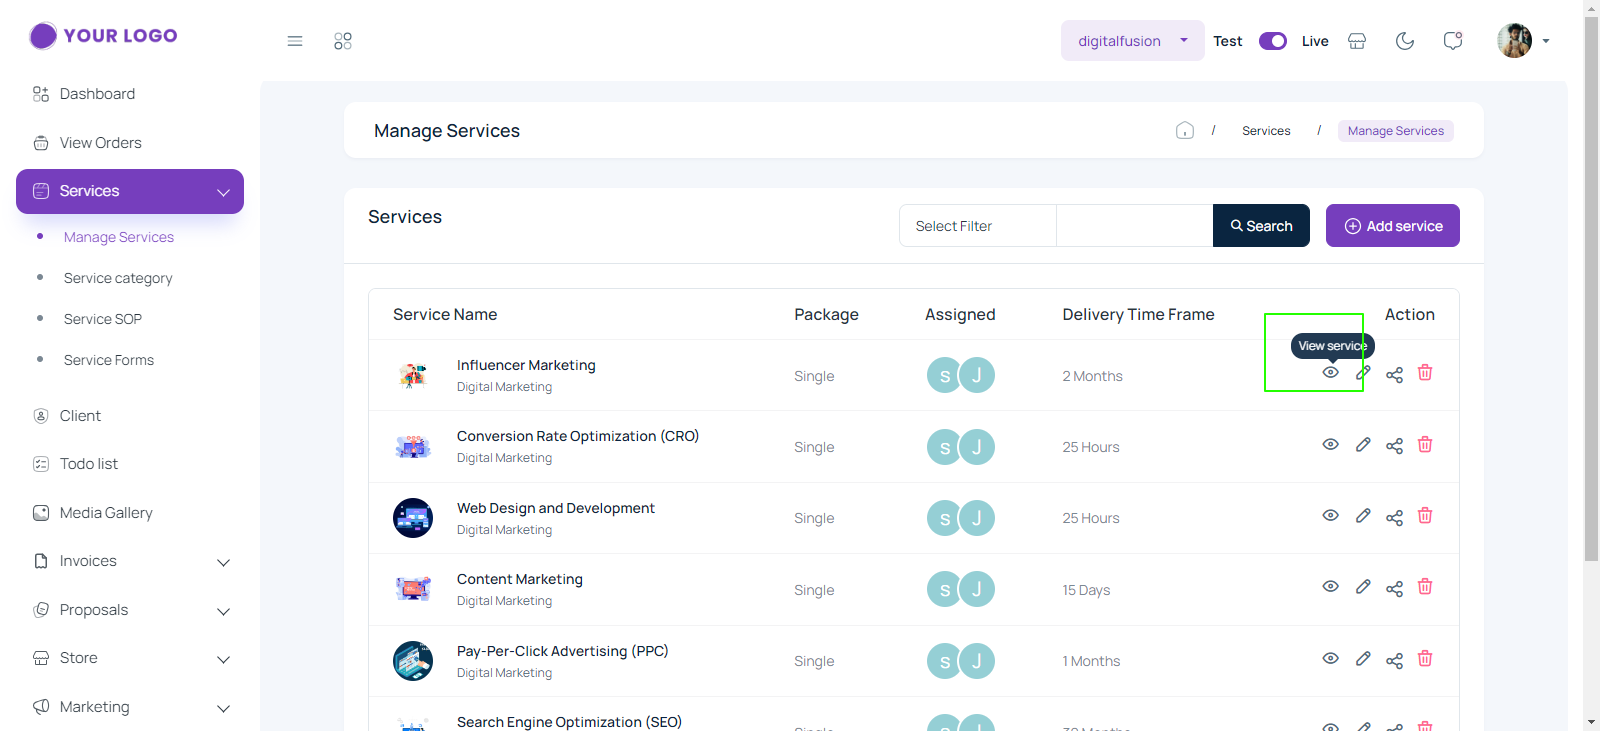
- The “View service” button allows you to view more details about a specific service listed. Clicking this button will display additional information about the selected service, such as its description, pricing, and other relevant details.
Edit Service #
From here, you can edit an existing service displayed in your store. You can update the details, pricing, and purchasing options. Choose whether the service is a one-time purchase or a recurring monthly subscription. Make sure the information is clear and accurate to maintain a seamless client experience.
# Pre-conditions to use the Feature:
- Users must have an Agency Simplifier account.
- Users must be logged into that account.
- At least one service must exist in the service section.
- Users must be super Admin/Admin to edit a service.
# Steps to Use: #
-
-
- Access Service Management: Log in to your Agency Simplifier account.
- Navigate to Services: Click on your account dashboard’s “Services” section.
- Then click on the “Manage services “ section in the “Services” section.
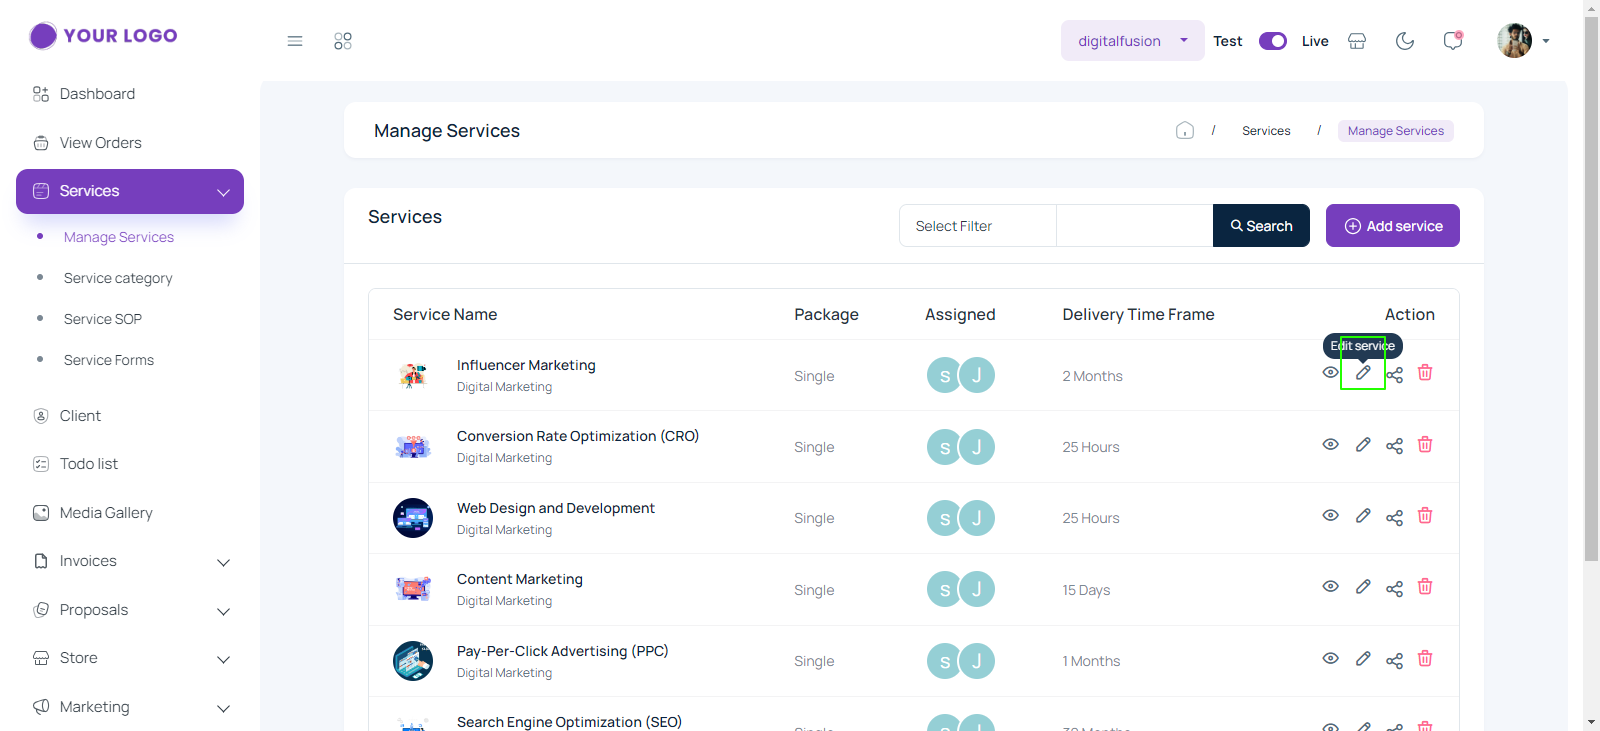
- Identify the service listing you want to edit/update. Click the “Edit service” icon button on the right side of the “Action” column. A form will appear.
- Once all modifications are made, click the “Save” button to save the changes to your service listing.
- Confirm that the service listing has been successfully updated with the new information.
- To confirm, click on the “Edit service” icon button on the Action column of the “Manage Service” page.
-
Delete Service #
# Steps to Use : #
- Log in to your Agency Simplifier account.
- Click on your account dashboard’s “Services” section.
- Then click on the “Manage services “ section in the “Services” section.
- Identify the service listing you want to delete. Click the “Delete service ” icon button on the right side of the “Action” column.
- A confirmation message will display.
- Click on the “Yes, Delete!” button.
- The message “Service has been deleted” will display. Click on the “Ok” button.
- Following these steps, users can easily delete service listings that are no longer relevant or needed in their Agency Simplifier profile.
Share Service #
# Steps to Use : #
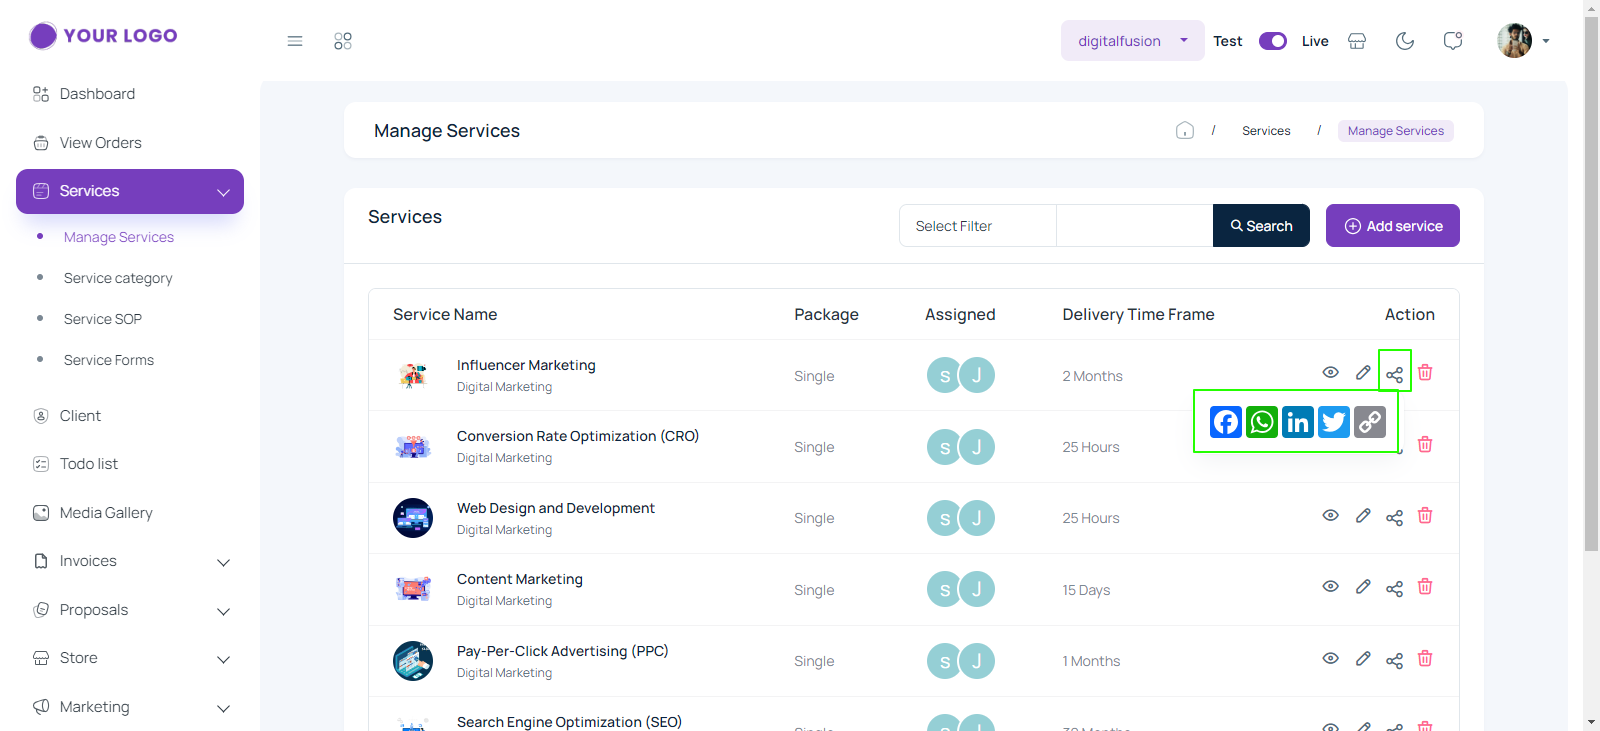
- In the action column, there is a ‘Share’ option.
- The share option contains different icons for sharing a task: Facebook, WhatsApp, LinkedIn, Twitter, and a link icon.
- Users can easily share a task across different platforms.
