Table of Contents
Whitelabel #
The “Whitelabel” option allows you to customize your domain and email settings to maintain a professional, branded experience for your clients. This includes setting up a custom subdomain and configuring SMTP settings for email communication.
Steps to Access and Set Up Whitelabel: #
- Access your account on the agency’s platform using your credentials.
- From the left navigation menu, click on “Settings.”

- Click on “Whitelabel” to open the white-label customization options.
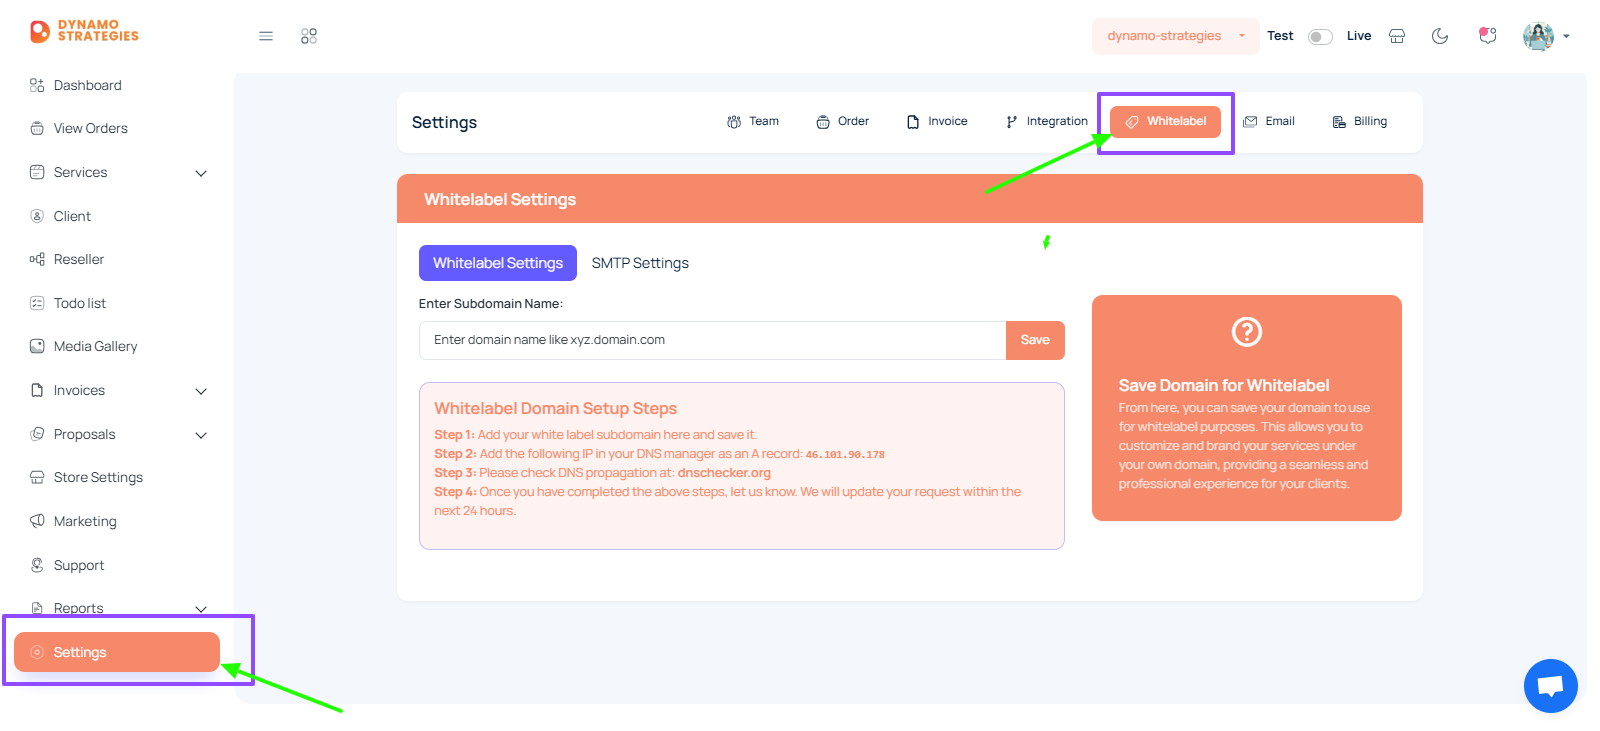
Setting Up a Whitelabel Domain #
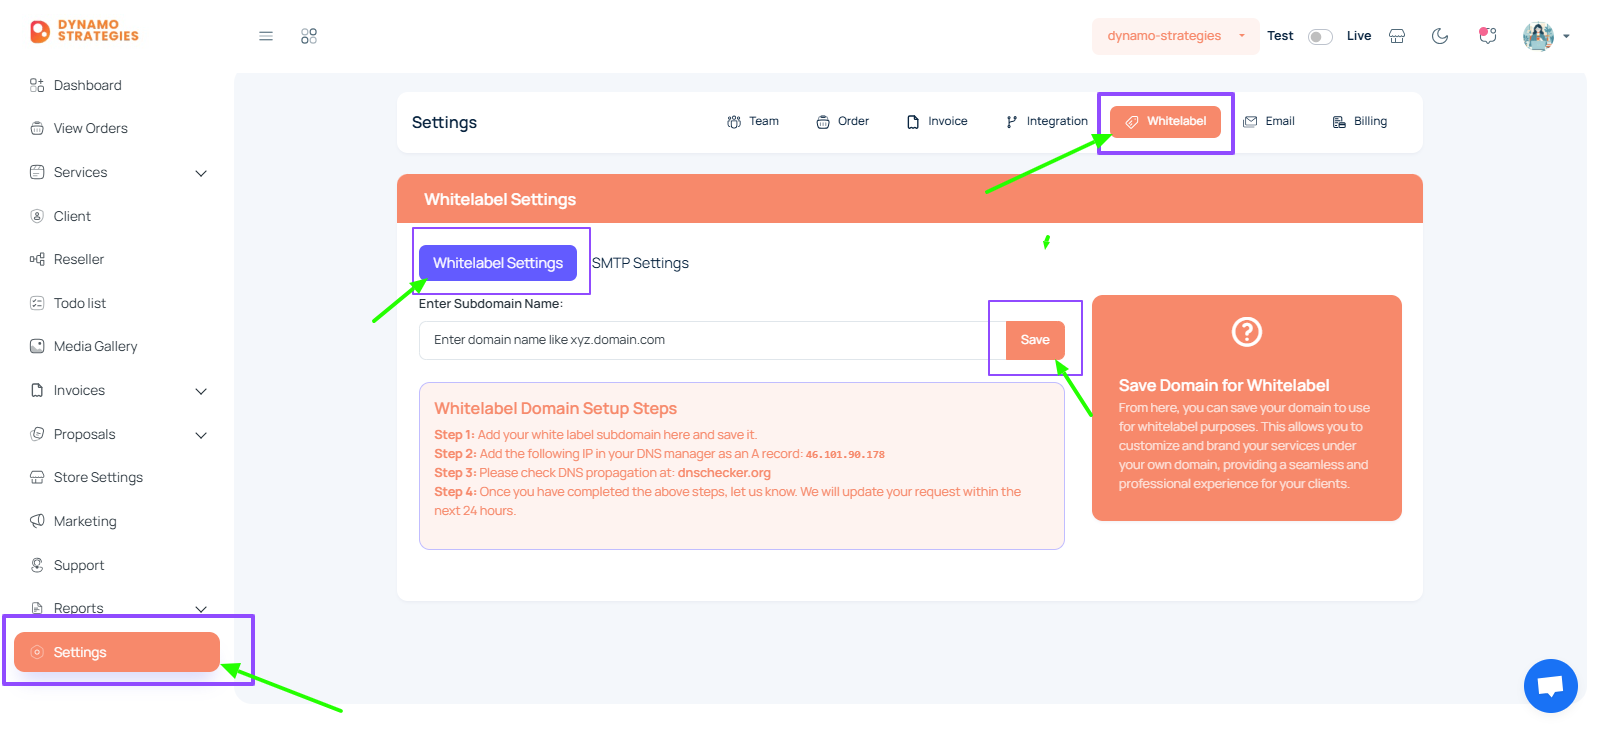
- In the “Whitelabel” section, you’ll see the option to set up a custom domain.
- Under “Whitelabel Settings”, enter the desired subdomain (e.g., ‘xyz.domain.com’) in the provided text box.
- After entering the subdomain, click the “Save” button to confirm your domain.
- Configure DNS Settings:
- Follow the steps in the “Whitelabel Domain Setup Steps” box:
- Step 1: Enter your whitelabel subdomain and save it.
- Step 2: Add the provided IP address (e.g., ‘46.101.90.178’) in your DNS manager as an A record.
- Step 3: Check DNS propagation using a tool like [dnschecker.org](https://dnschecker.org).
- Step 4: Inform the support team once your DNS settings are updated; the request will be processed within 24 hours.
- Follow the steps in the “Whitelabel Domain Setup Steps” box:
- This configuration lets you create a custom domain, enhancing your brand identity.
SMTP Settings #
- To ensure emails are sent from your own domain, configure the “SMTP Settings” in the White label section.
- In the “Whitelabel” section, click on the “SMTP Settings” button.
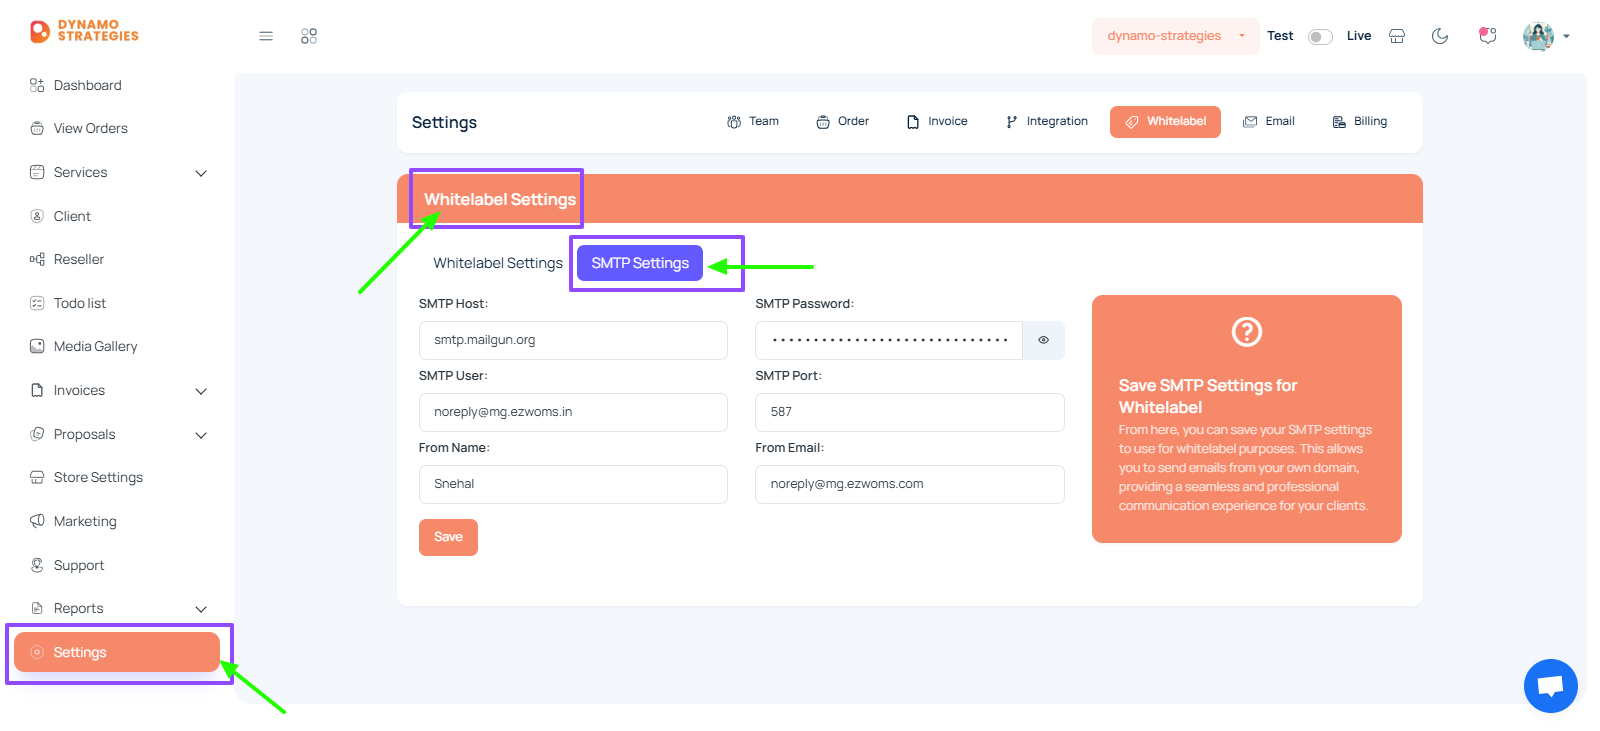
- Enter SMTP Details:
- SMTP Host: Enter your SMTP host (e.g., ‘smtp.mailgun.org’).
- SMTP User: Provide the SMTP username (e.g., ‘noreply@mg.ezwoms.in’).
- SMTP Password: Enter the SMTP password.
- SMTP Port: Typically, the SMTP port is ‘587’ for TLS or ‘465’ for SSL.
- From Name: Input the name that will appear as the sender (e.g., your agency’s name).
- From Email: Specify the email address used for outgoing emails (e.g., ‘noreply@mg.ezwoms.com’).
- After filling out the details, click “Save” to apply the SMTP settings.
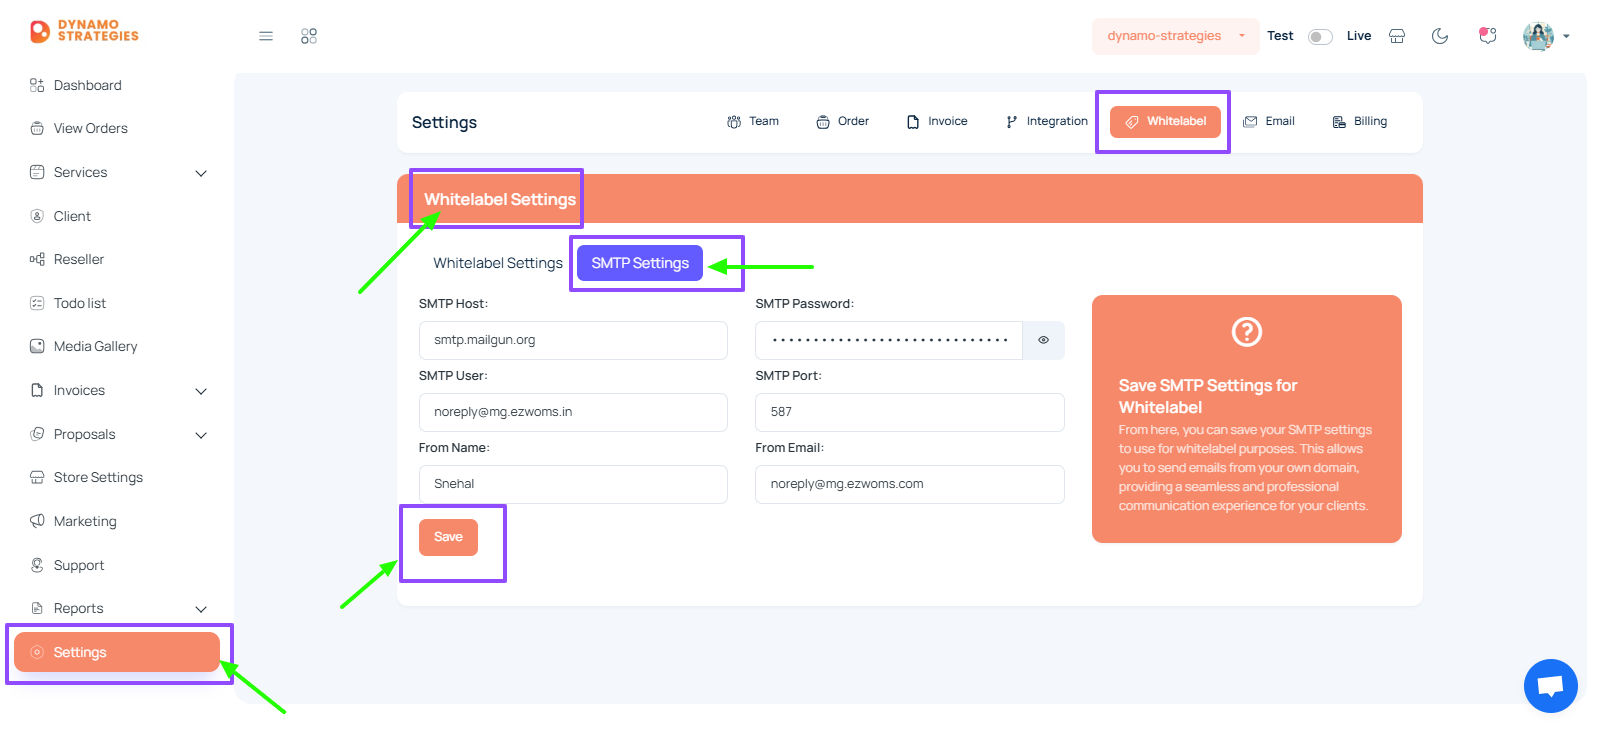
- This setup allows emails to be sent from your domain, giving your communications a more professional appearance.


